- Contacting prospects after an initial invitation campaign: the case of an unaccepted invitation
- I add my “Waiting” leads to an Orion sequence
- I delete pending invitations to send new ones
- How do I follow up with people who haven’t replied to my message?
- What to do with interested prospects following a campaign?
- How can I interpret my results using dashboards?
- Conclusion
You’ve followed all the steps to get , and now you’re wondering: what do I do with my leads after the first campaign? How do I handle my leads? How do I follow-up? How do I interpret the results?
If you’re asking yourself all these questions, you’ve come to the right place. 🌴
Contacting prospects after an initial invitation campaign: the case of an unaccepted invitation
You’ve run a campaign containing aninvitation step. Now you want to send a message to the prospects you’ve invited. But here’s the problem: some of these prospects haven’t accepted theinvitation (we can’t tell whether they simply declined, or just didn’t accept), they have the status “Waiting” on Waalaxy, and as a result, you can’t send them a message. This is because LinkedIn only allows you to send messages to people to whom you are connected.
So what do you do with these prospects after your first campaign?
I add my “Waiting” leads to an Orion sequence
On Waalaxy, most sequences require the prospect to be connected, or conversely, not connected, which means that if your prospect has a status of “Waiting”, well, he simply can’t enter the campaign. This is particularly true of message campaigns.
To contact a prospect with the status “Waiting”, the solution is to integrate them into a “Orion” sequence:
Orion and Orion 2 are of particular interest here, as they are the only sequences on Waalaxy that allow you to integrate leads “Waiting”.
Step 1: I filter my prospects in the previous campaign
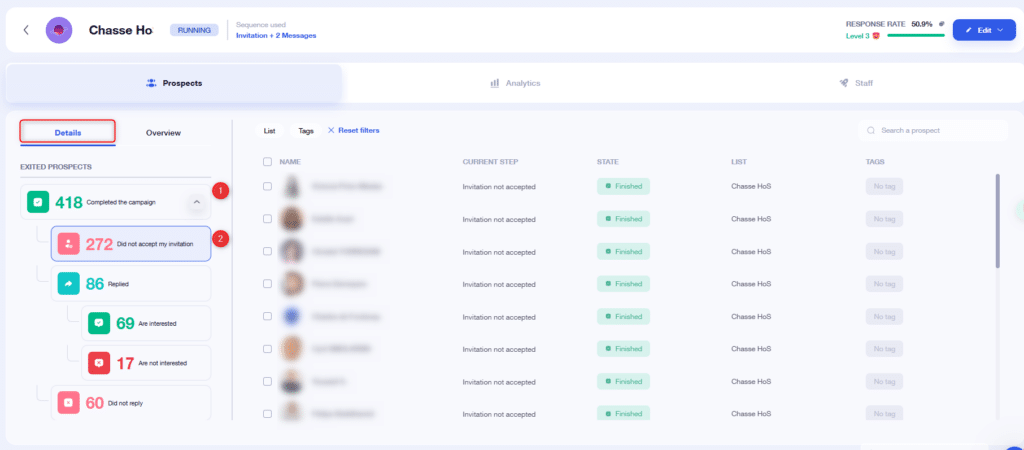
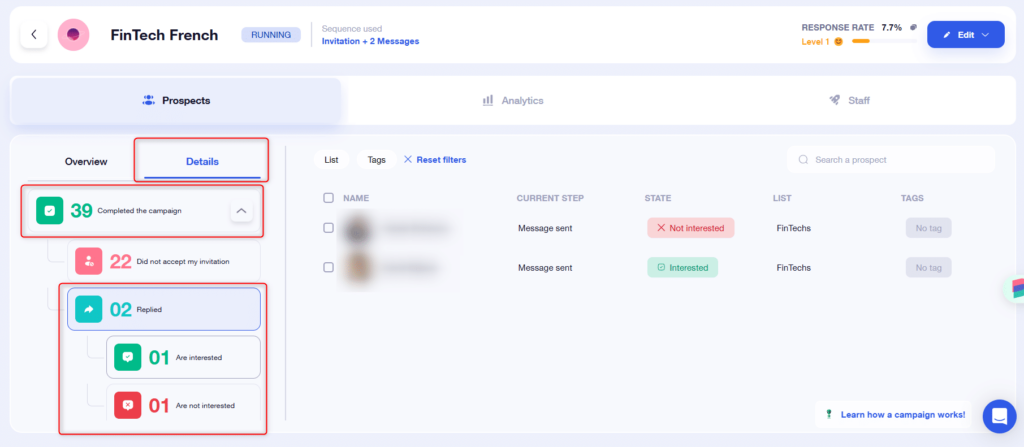
The first step is to go to the first invitation campaign, and the prospects who didn’t accept the invitation. To do this, go to the “Details” section of the campaign, then click on the “Have completed the campaign” arrow, then on “Have not accepted the invitation”:
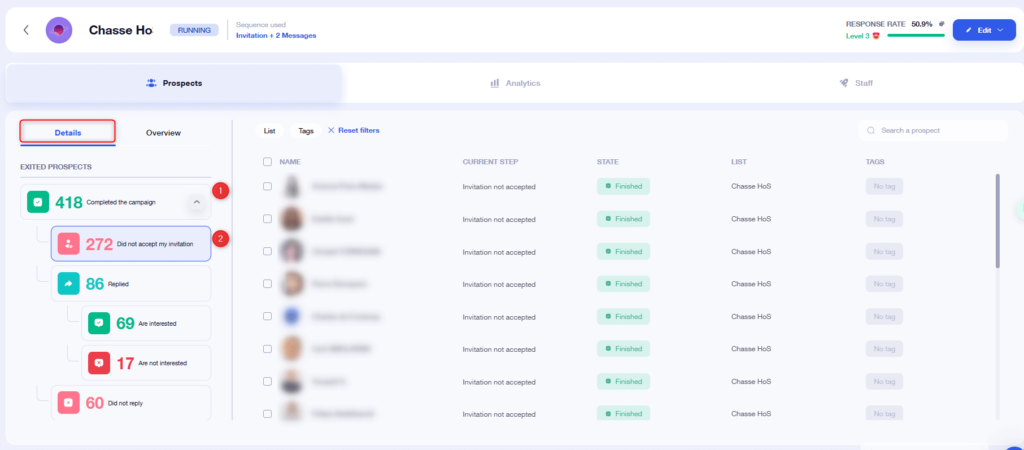
Then add a tag to these leads, for example “Orion”, or “to relaunch”:

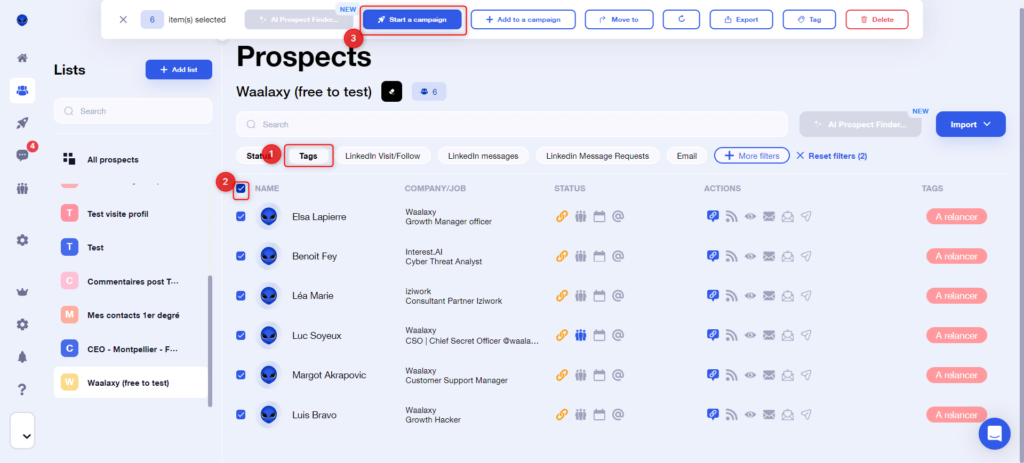
Step 2: I add my prospects to a new campaign from my Waalaxy list
Now that you’ve tagged your prospects, go to your list and filter them using the tag (1), select them (2) and start a new campaign (3):
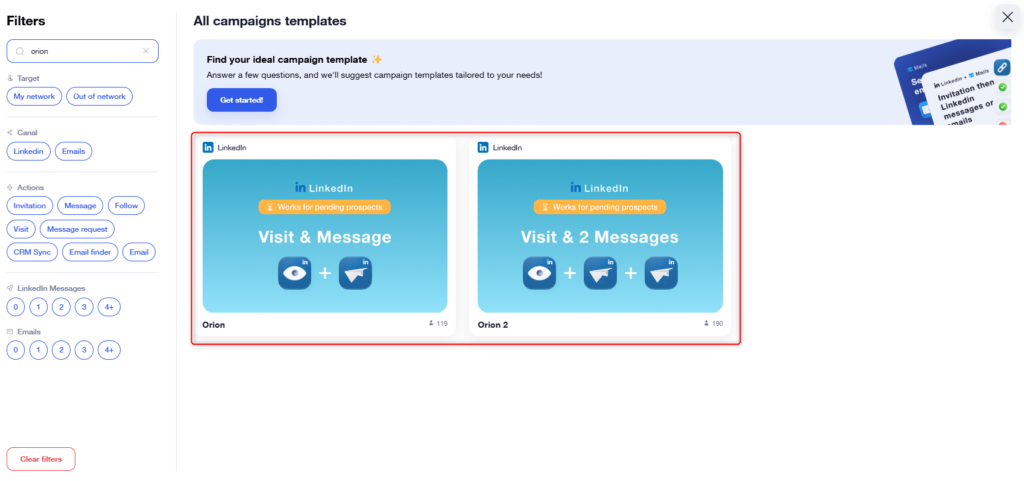
Click on “All campaign templates:

Type “Orion” in the search bar:

If you wish to send one message, select “Orion”, if you wish to send 2 messages, select “Orion 2”.
Step 3: Setting up my campaign
Once you’ve selected the sequence, you can move on to setting up the campaign, by writing the content of the message(s) to be sent.
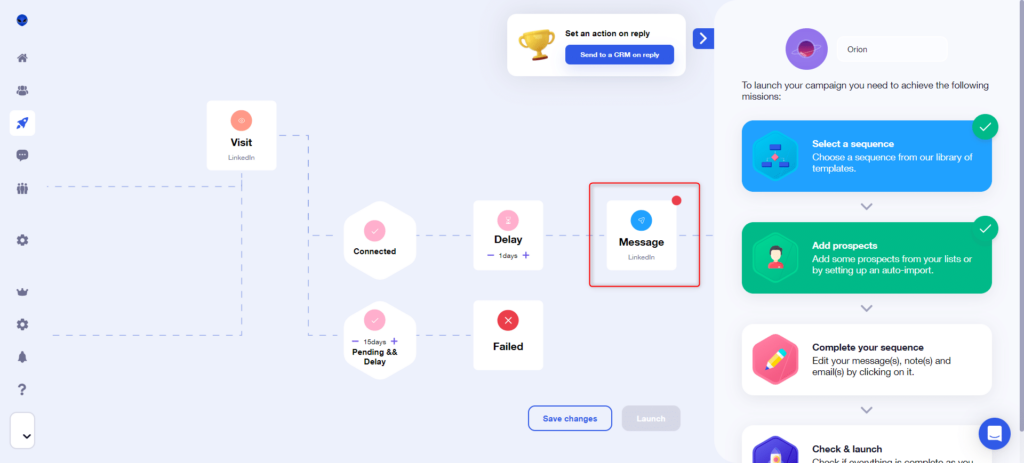
You can also set the delay, which is the time Waalaxy will wait for the prospect to accept your invitation, before removing them from the campaign (set to 15 days by default).
Step 4: I launch my campaign
All that’s left to do is click on “Launch”:
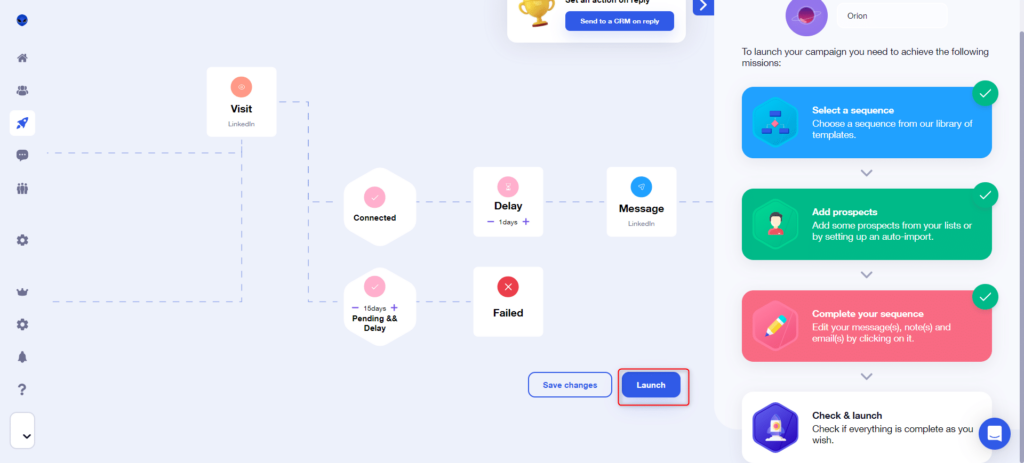
And that’s it! Your prospect’s profile will be visited. If he’s connected, he’ll receive the message, if he’s “Waiting”, a 15-day delay (or other if you’ve modified it) will be launched. If at the end of 15 days he’s still waiting, he’ll leave the campaign at “Fail”, otherwise he’ll receive the message(s) he’s due to receive 😊.
I delete pending invitations to send new ones
Although this isn’t what we recommend (it may seem a little “insistent” to send out a new invitation), it is possible to delete pending invitations, in order to send out new ones. I’ll explain the steps below!
Step 1: I delete pending invitations
You can click on the recycle garbage can 🗑️, just below your profile photo on the Waalaxy home page. You’ll then need to choose a date, and delete all invitations sent before that date:

Step 2: I identify the prospects I want to follow up
To do this, go to your previous campaign, and filter as before, in the campaign “Details”:
Then add a tag :
⚠️ LinkedIn imposes a three-week deadline for sending a new invitation after a pending invitation has been deleted. In the name of your tag, therefore, I invite you to indicate the date by which you must re-send these prospects. If they’re added to an invitation campaign before then, they’ll come out with an error 🔴.
Step 3: I add these prospects to a visit campaign
You’ll need to create a new visit campaign . At the prospect selection stage, you can filter your list with the tag added in step 2, to add prospects whosepending invitation has just been deleted.
This visit allows you to update the connection status back to “Not connected”.
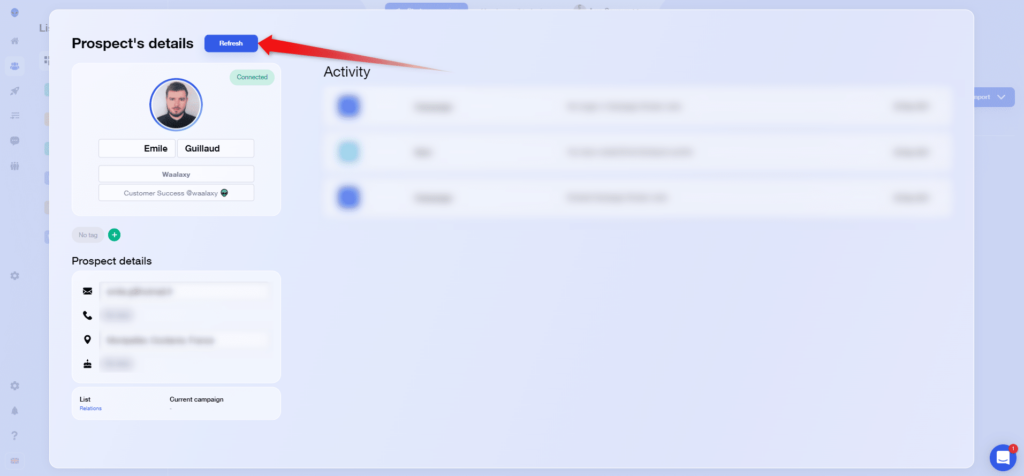
💡 You can also do this manually, for each prospect, like this:
Step 4: I add prospects to the new invitation campaign
Has the 3-week deadline passed? Now’s the time to add these prospects to a new invitation campaign, still filtering with the tag added in step 2.
And that’s it! Your prospects will soon receive a new invitation 👌.

How do I follow up with people who haven’t replied to my message?
You’ve run a campaign with one or more messages, but you’ve got prospects who haven’t responded. They’ve now finished the campaign, and you’d like to call them back. How do you go about it?
Step 1: Identify prospects who haven’t responded
It couldn’t be simpler. Go to the campaign, then to “Details”, and filter prospects with “Did not reply” :
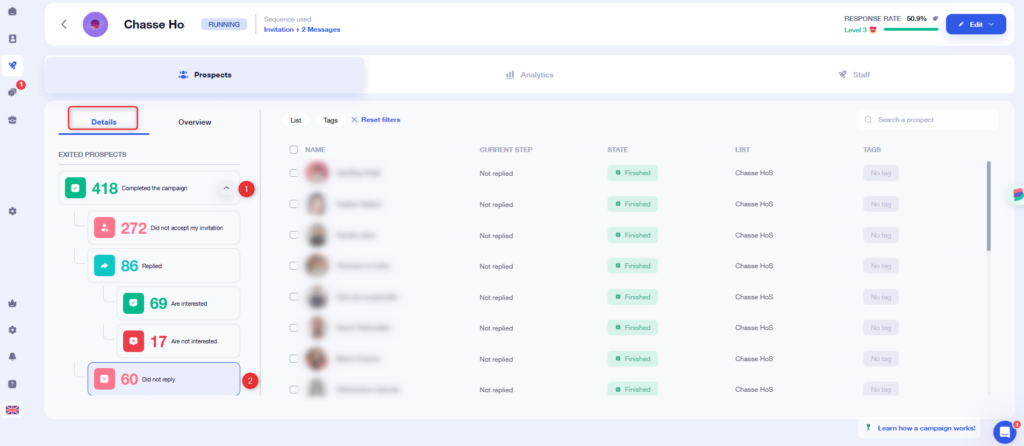
You then have a selection of prospects who have received all your campaign messages, but who have not followed up. You can then tag them with “To be relaunched”, for example, as described above.
Step 2: I select prospects and add them to a campaign
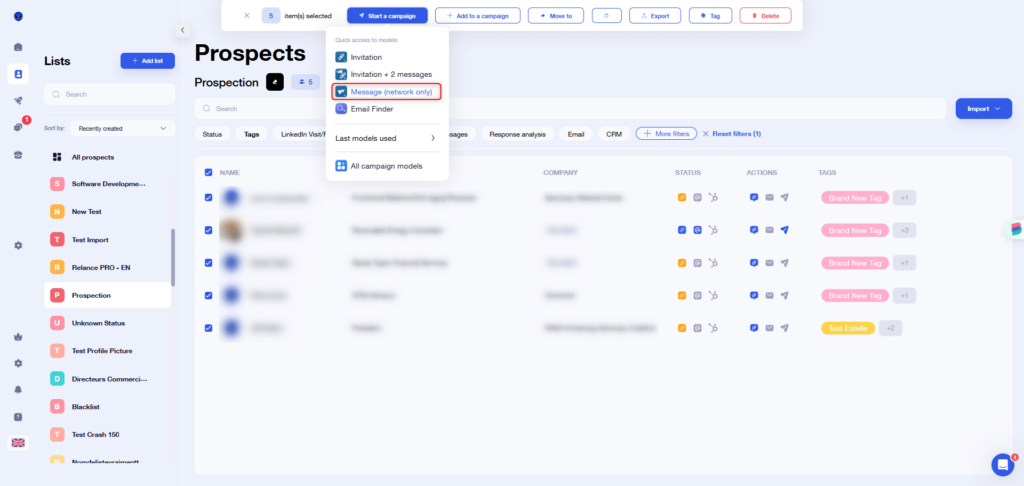
Now go to your lists, and filter with the tag you’ve just added. You can now select them, and click on “Start a campaign”, then select “Message” from the drop-down menu:
💡 If you want to send multiple messages, the process is the same, except that you’ll need to click on “All campaign templates”, and search for the sequence that includes the desired number of messages with filters.
Step 3: I set up and launch my campaign
Once you’ve chosen the sequence, all that’s left to do is set the parameters, including the content of the message (s) you want to send, and the time between each one. And finally: click on “Launch”. And that’s it 😎. Your prospects will soon receive a new message.
💡 We have a security feature that prevents you from sending the same message several times to prospects who have already received it (handy, isn’t it?). This security is based on the message template, not its content. In other words, if you change only the content of the message, it will be counted as a message that has already been sent and will therefore not be sent.
To contact prospects to whom you’ve already sent a message, you’ll need to create a brand new message template 👽.
What to do with interested prospects following a campaign?
Identifying interested prospects
This is the first step in organizing your prospecting strategy: identify your hot leads.
By hot leads, we mean prospects who have become leads thanks to your Waalaxy campaigns. They’ve become leads because you’ve interacted with them, they’ve responded to your messages, and they’re now part of your network.
We’ve integrated an AI into Waalaxy that analyzes your prospects’ response and tells you whether they’re interested or not. By going to the details, you can access the prospects who have responded, and filter them by clicking on“Not interested” or “Interested“:
You can simply use the example above to tag people who are interested in this campaign.
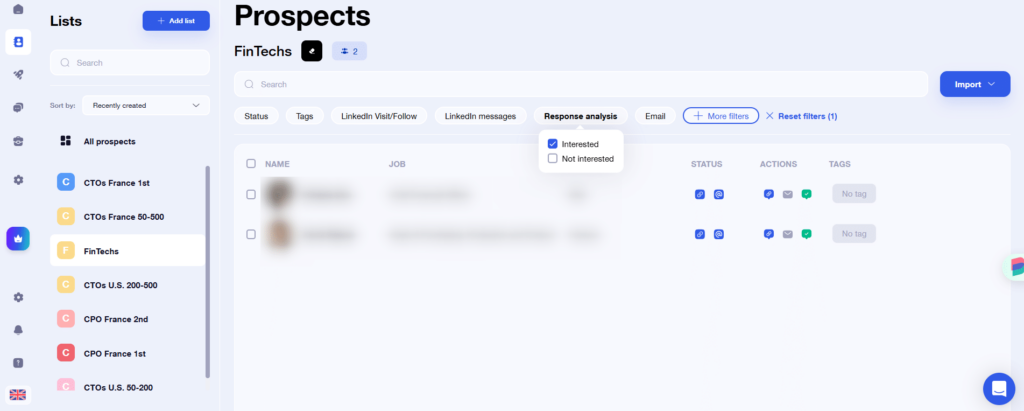
Alternatively, from your lists, you also have a “Response Analysis” filter that lets you filter according to this criterion:
Export my hot leads to CSV
Want to process your leads manually? That’s whatCSV export is for!
From your list, filter or tag the relevant prospects, then export them :

Export my hot leads to my CRM
Waalaxy lets you export your leads to your CRM, either natively, for HubSpot and noCRM, or using webhook and an integration tool like Zapier for all the others. To do this, you’ll need to add them to a campaign with a CRM Sync step.
Export all the people who reply to your messages automatically to your personal CRM
What makes this section different from the previous one is that here, we’ll set up a campaign that will automatically transfer all prospects who reply to your messages to your personal CRM, either natively or via Zapier.
The entire process for doing this is detailed in this article.
How can I interpret my results using dashboards?
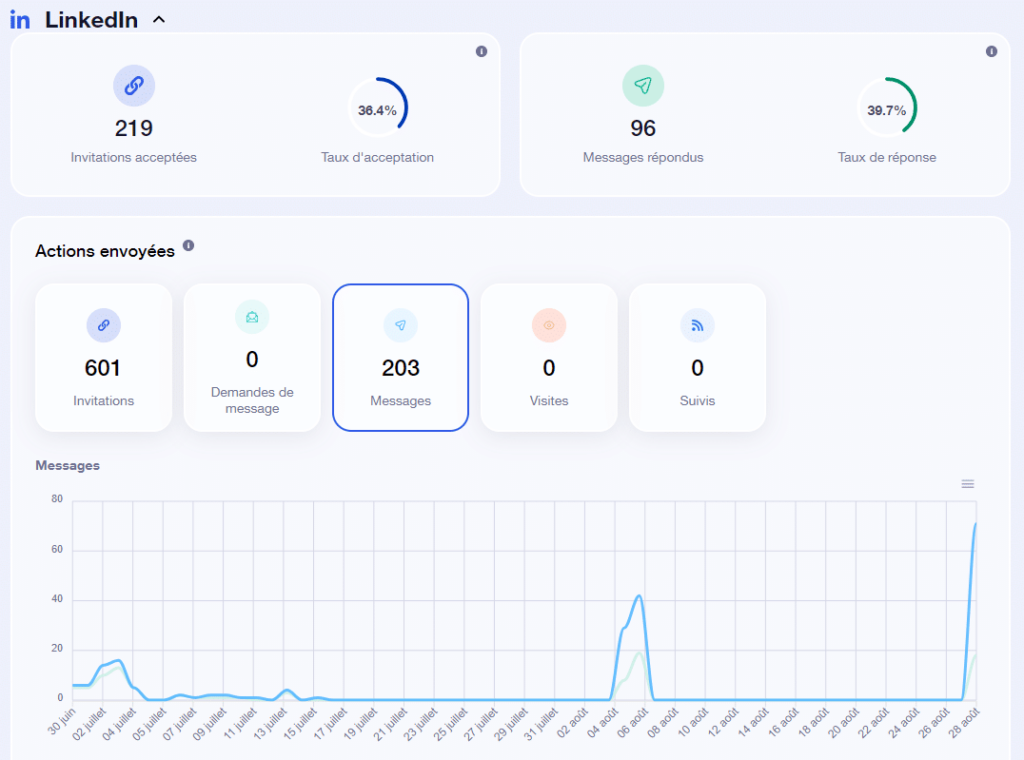
Waalaxy offers several dashboards. A global one, which you can view from the home page, showing results for all campaigns combined:
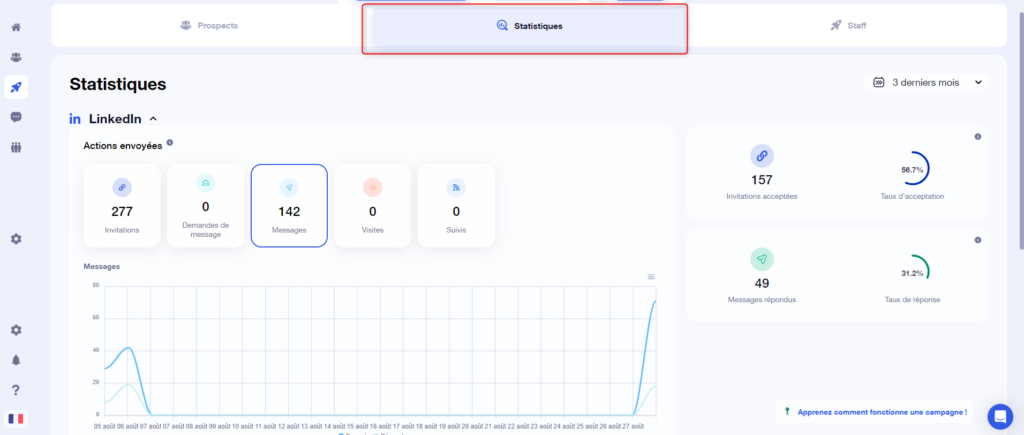
And a dashboard specific to each campaign, which you can view from your campaign’s “ Statistics” tab:
We’ve written a comprehensive article to help you analyze Waalaxy’s various performance indicators, so don’t hesitate to take a look 👁️.
Conclusion
And that’s it! You now know what to do with your leads after your first campaign. Now it’s up to you to decide whether or not it’s a good idea to follow them up, and then step up a gear to convert your leads into customers 😎