You’ve probably already heard the word ” retroplanning”. No, it is not an old school planning tool with a retro trend 🕺🏼mais. Here are the points we will discuss together:
- The definition as well as the advantages of using a retro planning.
- Making a retro-planning in only 5 steps.
- 3 free and downloadable retro-planning templates on Excel and Google Sheet.
Are you ready? Let’s go, we are leading the way. 💃🏼
Retro planning : the definition
In the word retroplanning there is… planning! Well, it’s just like a schedule except that this one is reversed. Yes, you read it right, instead of starting with the start date and ending with the end date, we do the opposite. In fact, it starts from the end date of the project, by cutting out the phases of your project step by step, which you will have defined beforehand.
Here is an example to illustrate what I mean. Don’t panic, in this article, we explain how to make one easily with the bonus of free templates you can download. 🎁
The use of a backward planning is especially effective when you know the end date of the project and it is quite far (several months). In particular, it can be used in events, such as a sporting event, a wedding or even a birthday.
The advantages of using a retro-planning
This rather particular planning allows in reality to reassure the project manager, the customer, the suppliers as well as the collaborators and to have a global vision of the project. But this is not the only advantage, here are 3 others! ⬇️
#1. Ensure the feasibility of a project
The fact that you already have the end date allows you to understand the intermediate steps more easily. Moreover, you will have a 360 view on the different phases of the project plan, those that are achievable and those that are not.
#2. Determine project milestones
During the project management phase, it can sometimes happen that new tasks are added that were not planned and, sometimes, the timeline set may be too tight. The retroplanning allows you to see these little worries as early as the project planning phase.
#3. Accurately estimate the resources needed for the project
By planning your steps and therefore your project, you will know more quickly the financial and human resources you will need to put in place to ensure its success.
Do a 5-step back-end planner
Well, now that you understand its usefulness, we suggest you move on to the most crunchy step of this article, making a back planner. ✨
1) Define the project tasks
First step and not the least, you need to start by listing the different tasks or missions needed to complete the online project.
Be sure to categorize the main tasks, the subtasks and the side tasks. For example, if you need to create a website in order to get leads, here are the different possible tasks: 👇🏼
| Main tasks 🥇 | Secondary tasks 🥈 |
| Set up a specification. |
|
| Graphic charter and web design. |
|
| Putting in pre-production. |
|
| SEO optimization. |
|
| Putting the site online. |
|
The content of your tasks must be as clear and detailed as possible. If possible, number each list of tasks, we will need them for the next step.
2) Determine who is responsible for each task
Once you have listed all the missions, tasks and subtasks, the project manager can list for each task, who is the responsible person, i.e. the person who will be in charge of performing the mission. 🫡
It goes without saying, in marketing, one person can handle multiple tasks, but take into account that some tasks take more time than others. ⏲️
3) Define a task duration
It is often difficult to estimate the duration of a task. Nevertheless, this step is essential in planning your schedules because, if you happen to be wrong on several durations, it could quickly lead to additional costs and therefore, a delay on your end date.
Don’t be too greedy 🍰, be as realistic as possible and don’t hesitate to define the duration of each task in days, weeks and sometimes, months. 🗓️
4) Order the tasks in a chronological way
Let’s move on to one of the most important tasks, arranging tasks through reverse scheduling. Once you have listed all your tasks with letters, assigned them and set a duration, you can now start your planning. 📅
We want to remind you of one thing, some tasks cannot be completed until another one is finished, so make sure you take all the different tasks and subtasks into account. 📖
Use a task tool like the pert diagram
You’re probably wondering how to accomplish this in a clean way. Well, there is a visual project planning tool called the PERT (Program Evaluation and Review Technic) chart. 😎 The purpose of this tool is to organize the tasks in the form of bubbles and lines in order to see 👀 distinctly the connections between the different tasks, the duration as well as the interdependencies.
For you to understand better, here is an example.
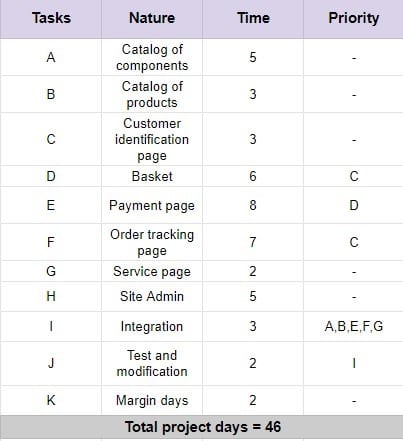
For this website creation project progress, we have listed some tasks such as the creation of several pages, with a duration for each one as well as its precedence if there is one.
Once this table is done, we have declined it in the form of a Pert diagram, and here is the result. ⬇️ 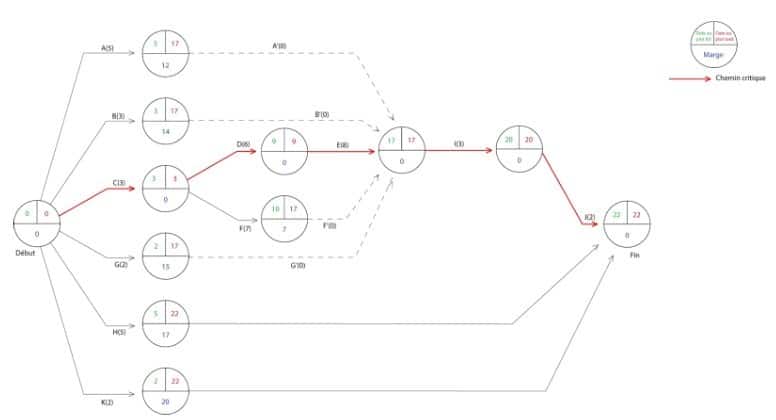
We can now understand better the connections between the different tasks.
We can now make our backward planning in the clean. 🎇
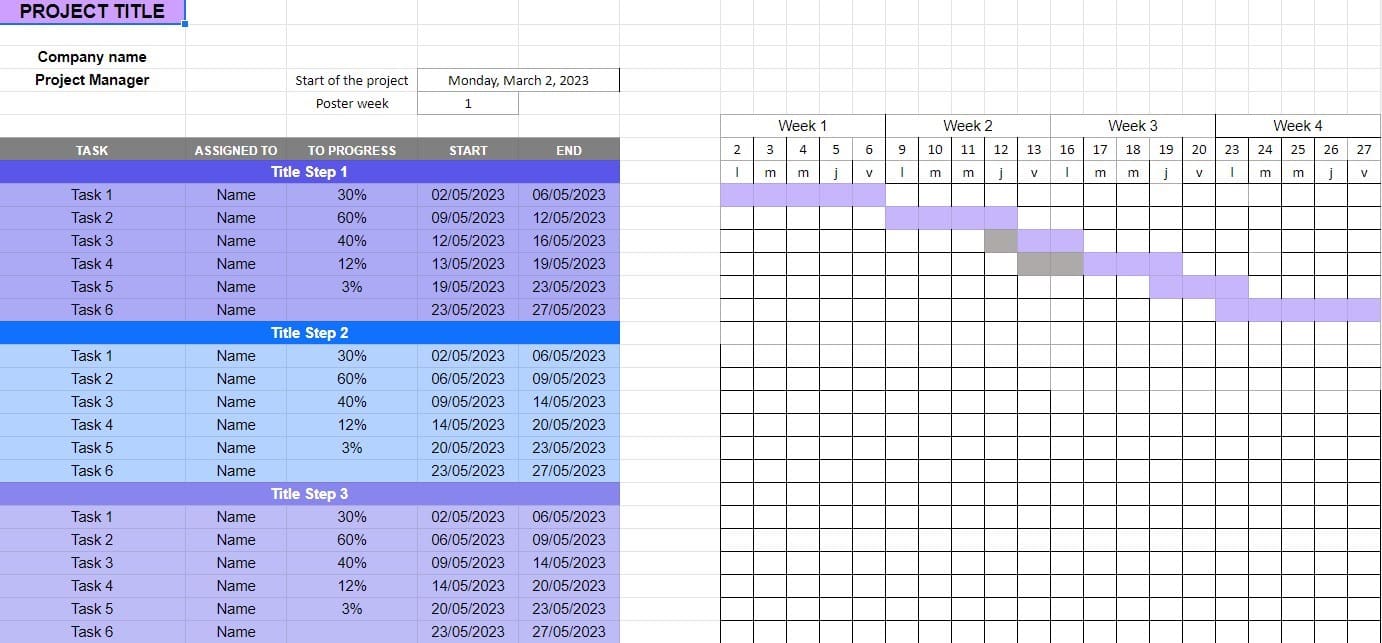
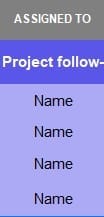
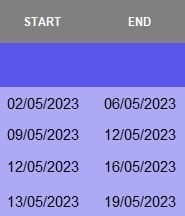
5) Clean up the retro planning with the Gantt chart
Promised, this is the last diagram we will use. Almost indispensable for making a retro planner, the Gantt chart will be your best friend. Before we start, cultural point of the day, who is Mr. Gantt? 🤔
Henry Laurence Gantt was a mechanical engineer and management consultant. This one developed the Gantt chart in 1910.
Let’s now move on to making backward planning with this management tool. Once you have finished your Pert chart, you can enter all the tasks in the new chart.
You are probably wondering which project management software can be used to create this reverse schedule?
Well, you have the choice, Excel or Google Sheet, the choice is multiple.
Backward planning excel to download
As we are kind, and we like to please you, we offer you a retro planning template that you can download, and all, for free, it is a gift. 🎁
[maxbutton id=”78″ url=”https://blog.waalaxy.com/wp-content/uploads/2023/03/retroplanning-US.xlsx” text=”Download free Excel retroplanning template 🚀” nofollow=”true” ]
[maxbutton id=”78″ url=”https://docs.google.com/spreadsheets/d/1ukK4VHFHJNCmo8z4MBhP_9DMc5eExuE7KDJhkou2k0I/edit?usp=sharing” text=”Download retroplanning template on Google Sheet 🚀” nofollow=”true”]
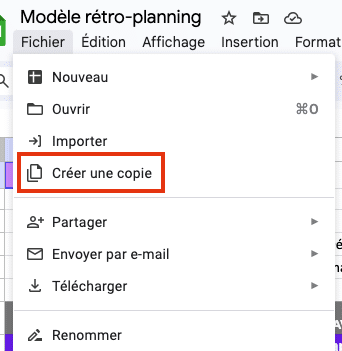
To use our templates via Google Sheet, simply click on the “File” button and then on “Create a copy”. ✨
3 free reverse engineering templates
Yes yes, you read that right. In addition to the basic template, we offer you 3 other free retroplanning templates ➡️ wedding, event and a design. It’s not Christmas yet, but let’s go for the presents! 🎅🏼
1. Retroplanning for a wedding
Most future brides and grooms and wedding planners will surely tell you that organizing a wedding requires a lot of preparation, often one or two years in advance. To get better organized, you can make a retro planning, like this one. ⬇️ 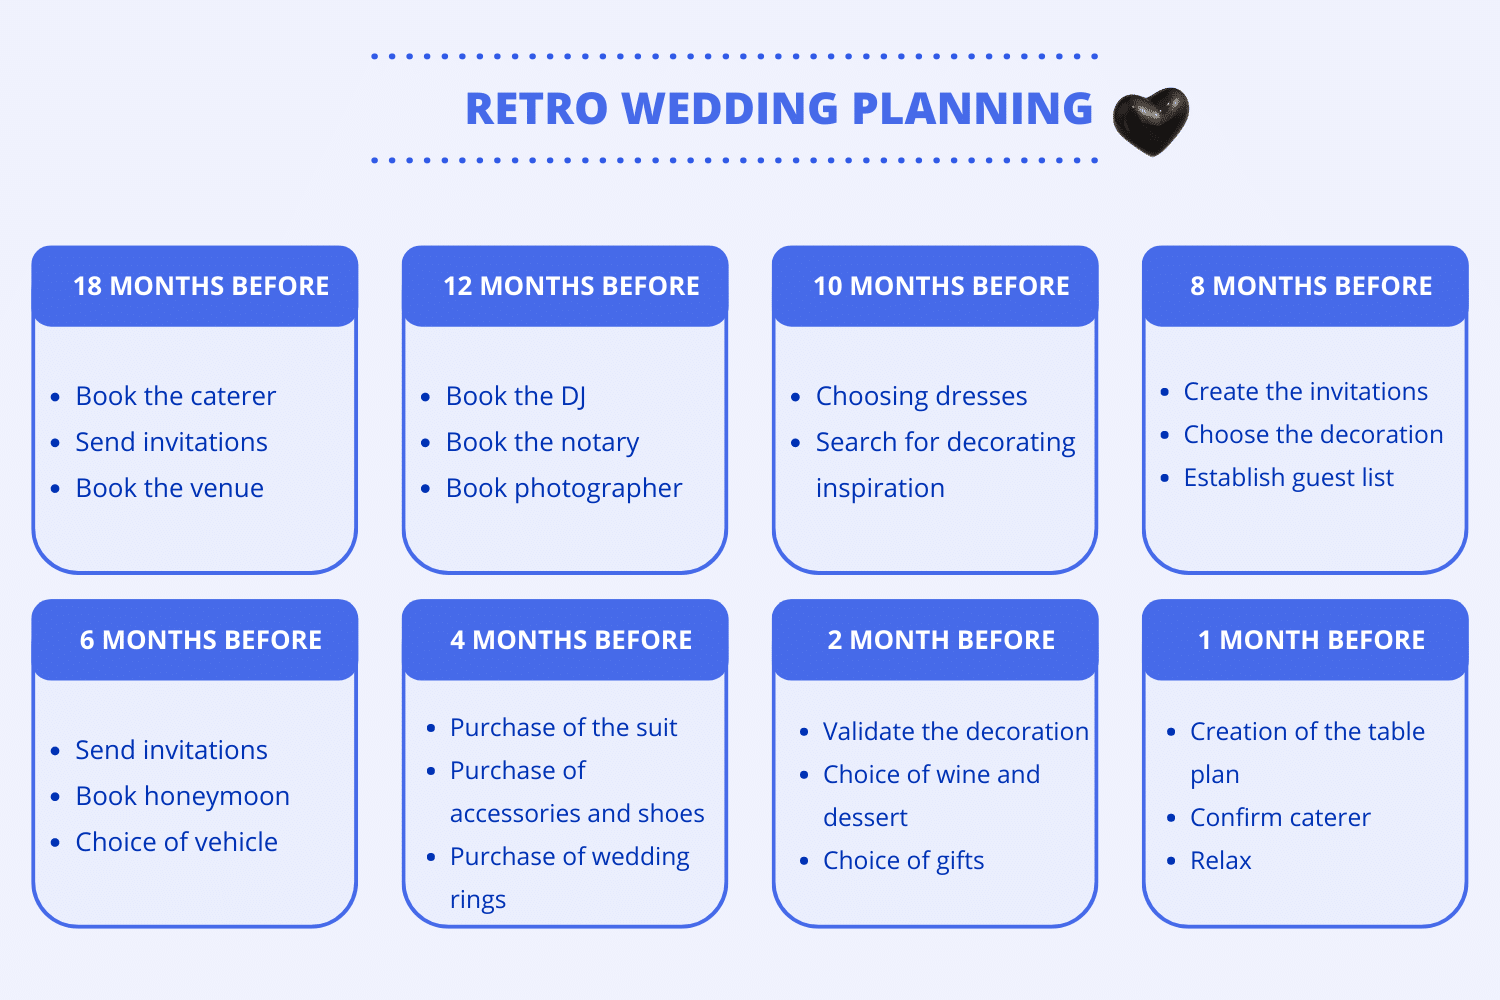 If you want to get this template and be able to modify it as you wish, you can do so directly on Canva, by clicking on the button below. 👇🏼
[maxbutton id=”78″ url=”https://www.canva.com/design/DAFcbfOwri0/qNKpSpMeDyk7Aq5hG__T5A/view?utm_content=DAFcbfOwri0&utm_campaign=designshare&utm_medium=link&utm_source=publishsharelink&mode=preview” text=”Download the wedding backplanner 💍” nofollow=”true” ]
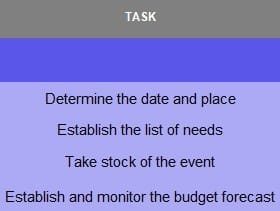
2. Retro-planning for events
Another time when we advise you to use a reverse planning is during an event such as a soccer game, a theme party or a birthday party. In our case, we have made an example of a big birthday party with room reservation, DJ, caterer and all that follows. Just click the button to get our Excel file or Google Sheet link, it’s up to you. 🔥
[maxbutton id=”78″ url=”https://blog.waalaxy.com/wp-content/uploads/2023/03/retroplanning-event.xlsx” text=”Download the event reverse planning on Excel🚀” nofollow=”true” ]
[maxbutton id=”78″ url=”https://docs.google.com/spreadsheets/d/1vOu2LNhfBiGWeErVMSal4S2b3vYc3hTSCaPPGmo1Uw4/edit?usp=sharing” text=”Download the retro event planning on Google Sheet 🚀” nofollow=”true”]
To use our templates via Google Sheet, simply click on the “File” button and then on “Create a copy”. ✨
3. Retroplanning design on canva
As you may have noticed for the wedding retro-planning, you can totally make Gantt charts a bit more visual, thanks to graphic tools such as Canva. Here is an example of a design you can make. 💟 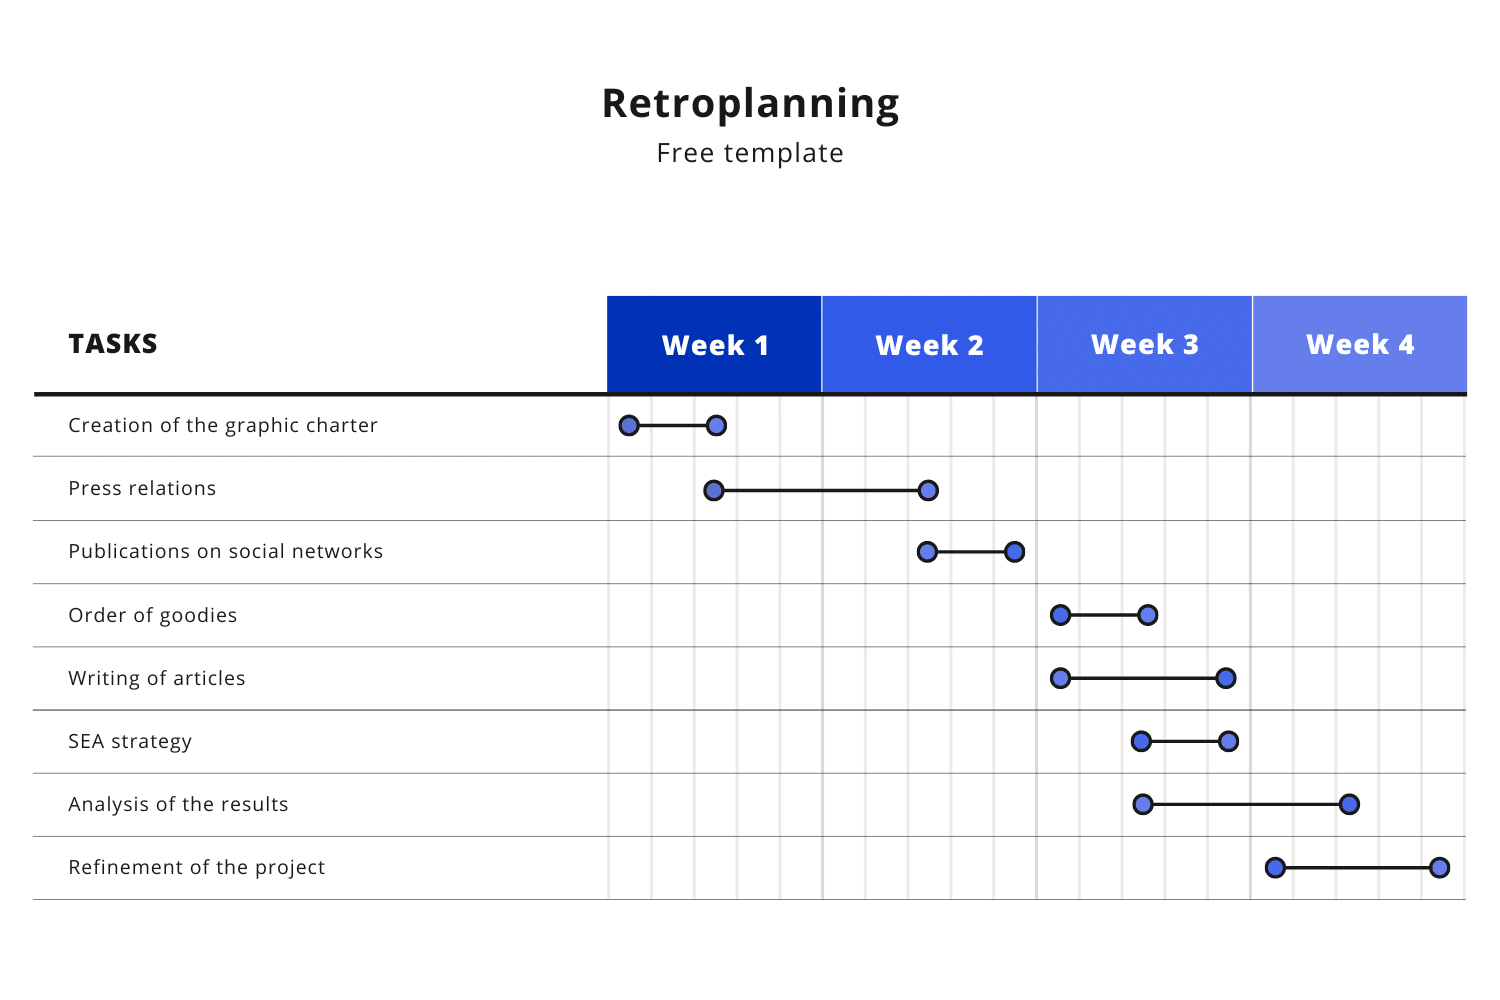 Obviously, we promised you, click on the button below to access this reverse schedule for free. 🤑
[maxbutton id=”78″ url=”https://www.canva.com/design/DAFca-AIKuc/pC2BpLP6KeaBnPvifTafkg/view?utm_content=DAFca-AIKuc&utm_campaign=designshare&utm_medium=link&utm_source=publishsharelink&mode=preview” text=”Download the retroplanning design template 🔥” nofollow=”true” ]

Small recap of the article: retroplanning example
Yes, it’s already almost the end of this article, but at least you now have all the resources you need to make a great retroplanning! 🦋
We wanted to give you one last bit of advice, if you realize in the middle of your project that some dates will not be able to be met, don’t be pessimistic, it happens, just review your other deadlines and discuss with your collaborators about the feasibility of the assignments and dates. 😇
Frequently Asked Questions
Not so fast, we still have a few resources to pass along to further your knowledge. 💭
What is the difference between planning and retroplanning?
Even if the goal is the same for both, the functioning on the other hand, is not. Indeed, for a classic planning, you plan your project from the start date of the project, while with a retroplanning, you only start to plan from the end date of your project and you go back to the start date.
How do I make a task schedule?
If you want to make a clear and concise task schedule, we advise you to do the following:
- List the different tasks in order of priority.
- List the different tasks in order of priority. Create categories and sub-categories if necessary.
- Define the end dates of the tasks.
- Plan your schedule in advance.
- Take a look 👀 regularly at your schedule (at least, once a week).
How to make a retroactive schedule?
Retroactive planning, Gantt chart, reverse planning, or retroplanning mean the same thing. Indeed, even if the wording is different, the technique remains the same. So, don’t panic, just follow our tutorial that allows you to track the progress of the project as well as the end of the project. 🥰
Now it’s up to you to set up a retroplanning. We look forward to your feedback 🔥.