Have you imported prospects into Waalaxy and want to contact them? Yes, but problem: on LinkedIn, in order to contact prospects, you need to be connected with them 😥.
A solution for every problem! You’ll be able to contact prospects with Waalaxy, by launching a 2-in-1 “Invitation + Message” campaign, which will allow you to automate the sending of an invitation, then a message, once the prospect has accepted your invitation 🤩.
Onwards to the tuto! 🚗
Step 1: Select your prospects
You have imported your prospects with whom you are not connected into a Waalaxy list, whether via a LinkedIn search, a CSV, or another method.
The first step is to select your prospects :
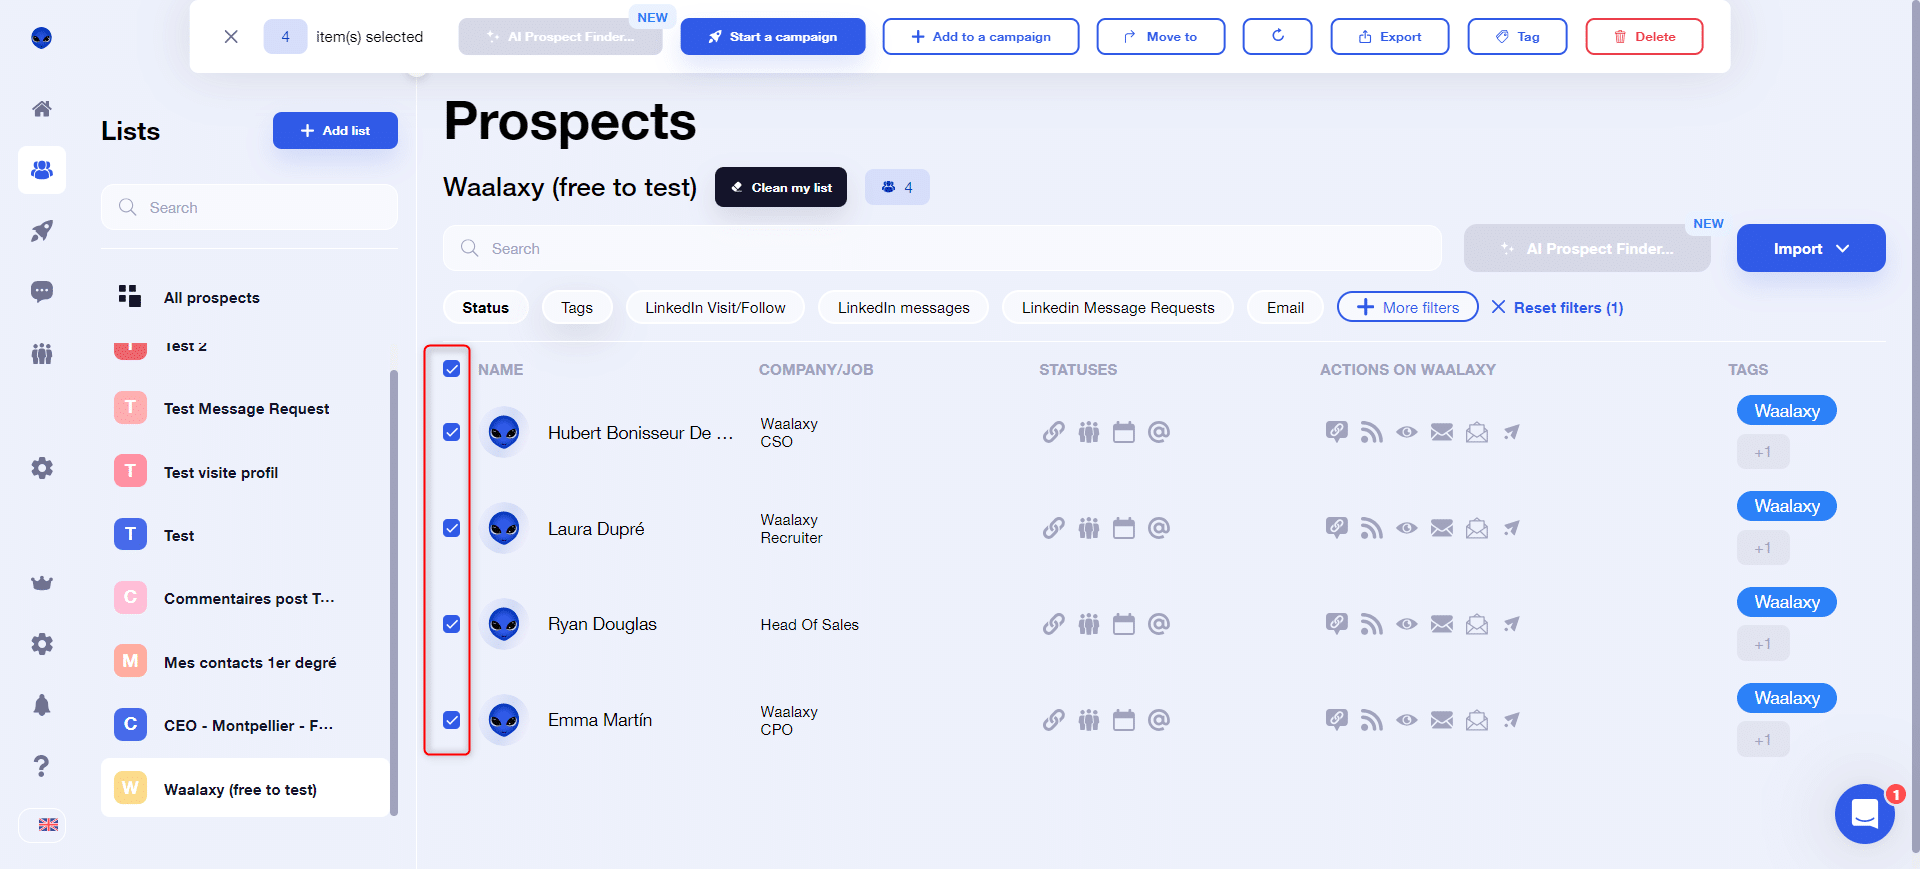
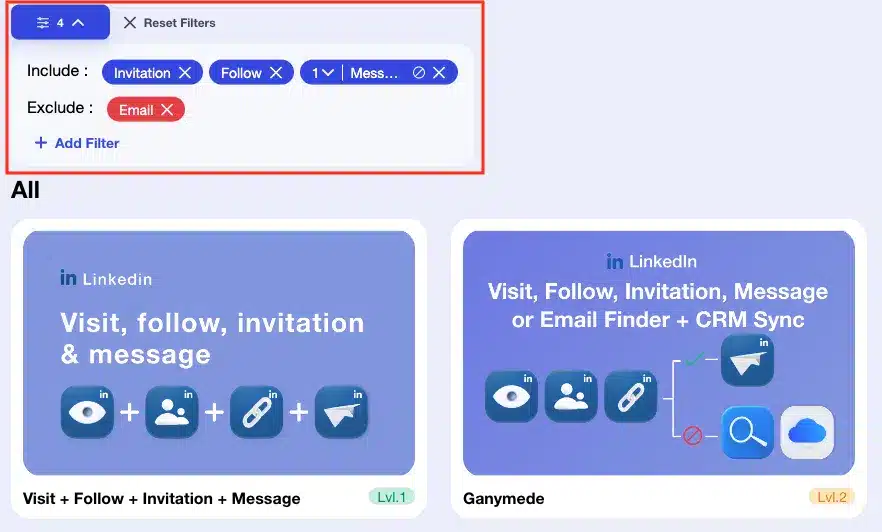
💡If you have connected, pending and non-connected prospects in your list, Waalaxy will automatically sort them out when you add them to your campaign, selecting only those with “Not connected” status. You, on the other hand, can view them more easily by applying the Waalaxy filter “Status: Not connected”:

Step 2: Add your prospects to a new “Invitation + Message” campaign
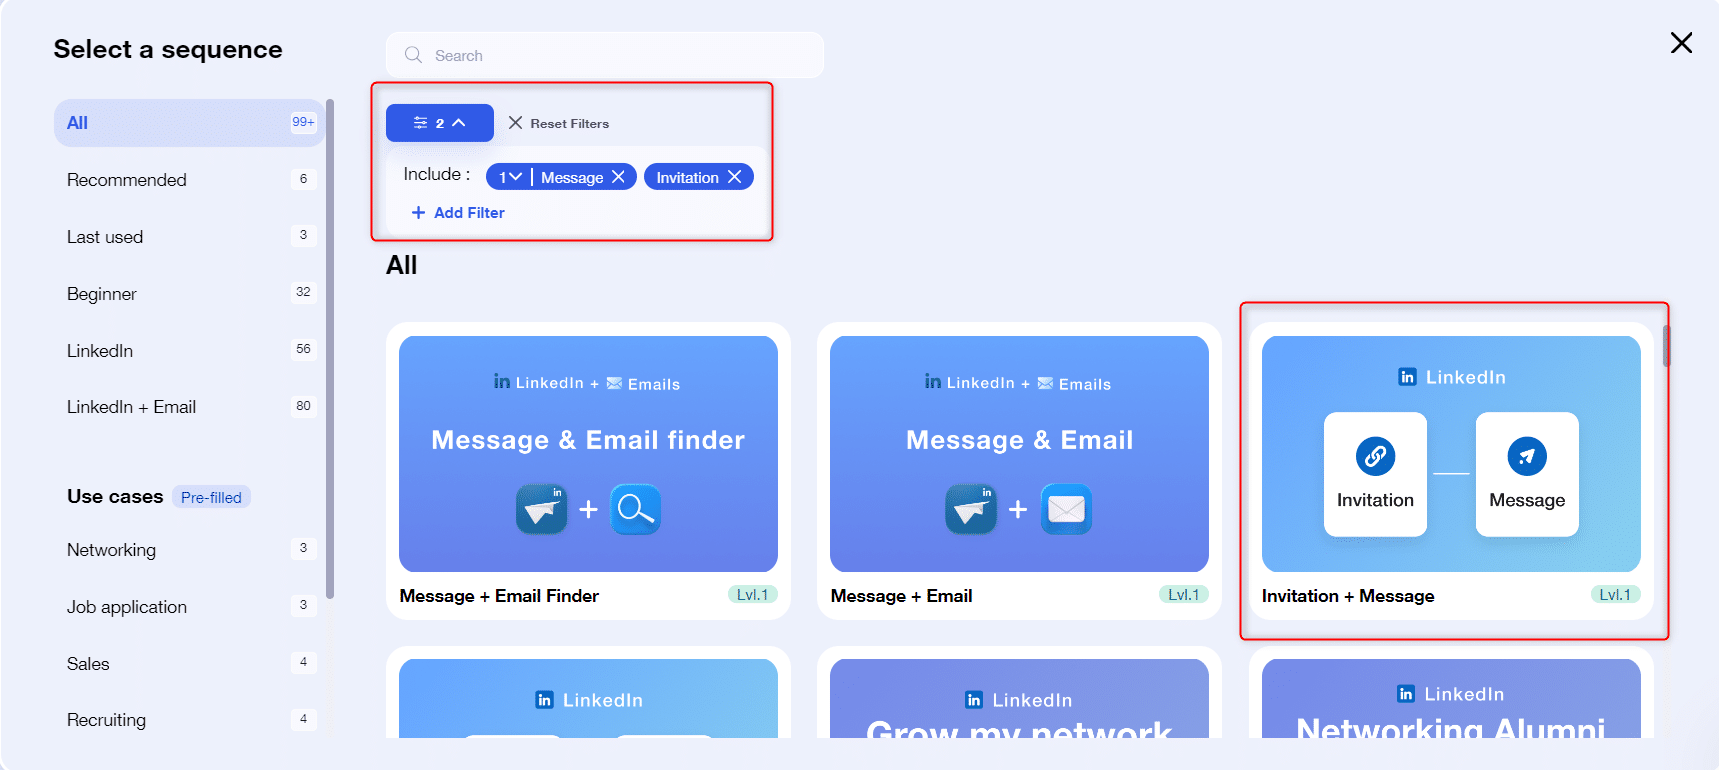
Once you’ve selected your prospects, you can click on “Start a campaign” in the toolbar at the top of the screen. If the “Invitation + Message” sequence is in the menu, you can click on it directly, otherwise click on “Browse sequences“:

You will be redirected to the sequence search engine. You can then apply the “Invitation” and “Message” filters to find the right Waalaxy sequence:
Step 3: Set up your campaign
You’ve selected your sequence, now it’s time to set up your campaign, i.e. determine the content of the sequence, as well as the dispatch deadlines. Once you’ve clicked on the desired sequence, you’ll arrive here:
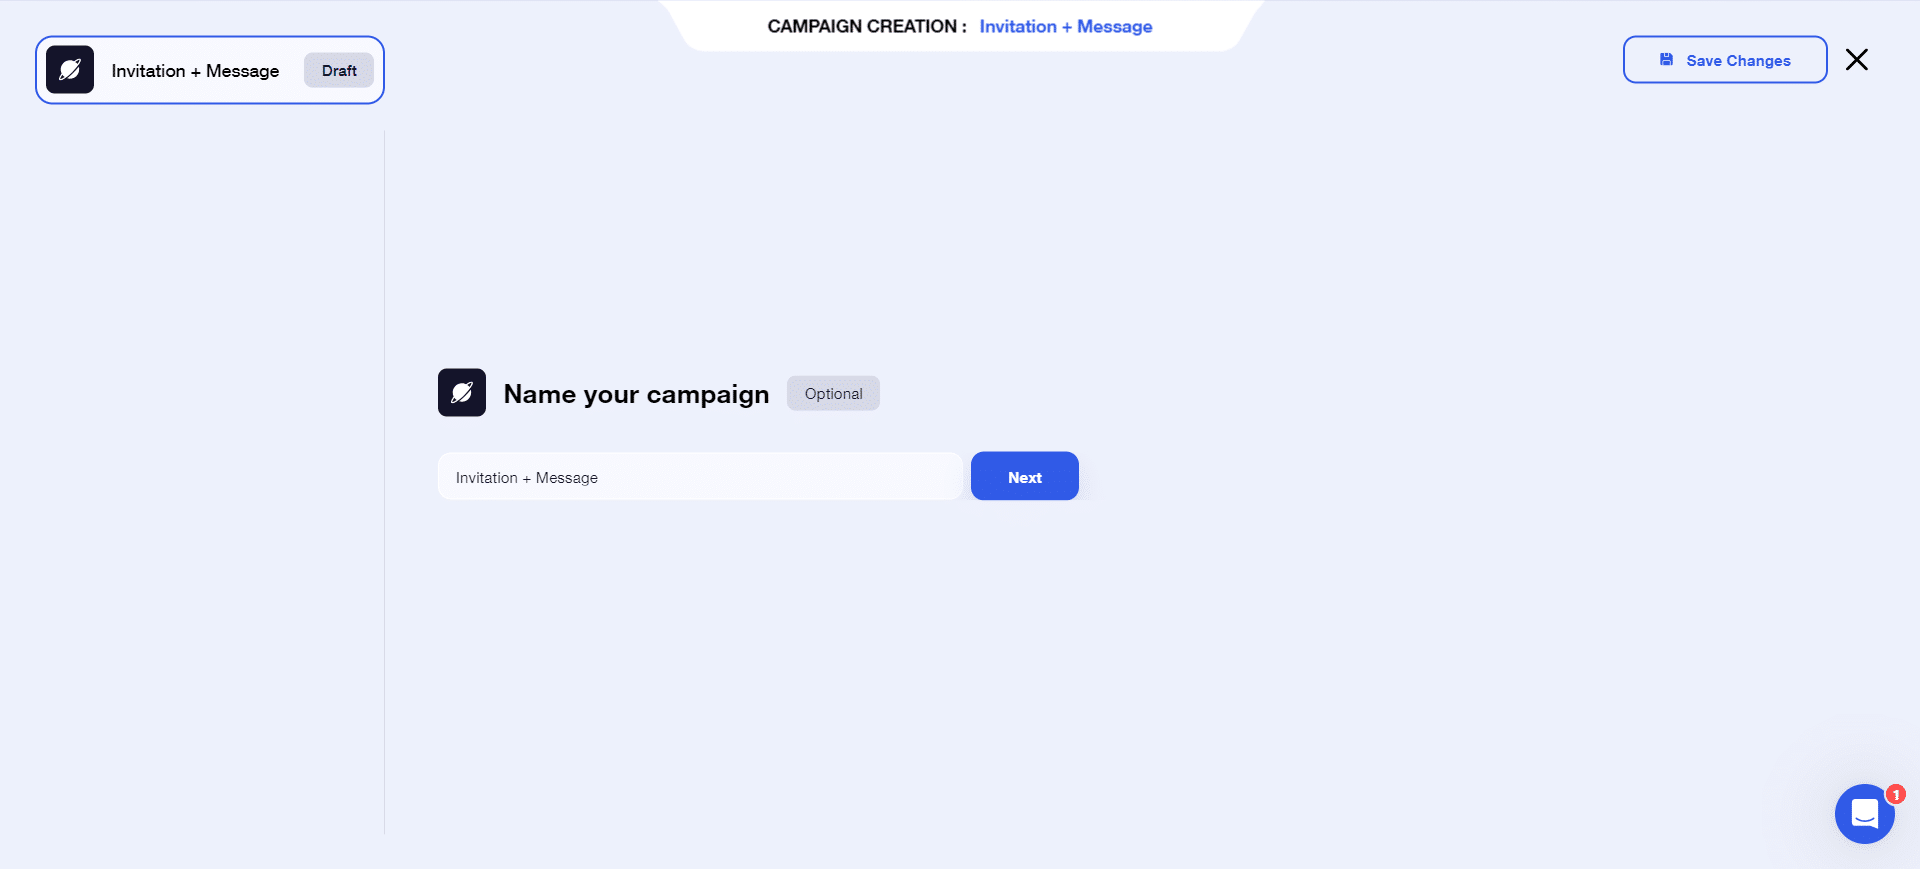
Give your campaign a name , then click “Next”.
Depending on your LinkedIn subscription, you may choose to add (or not) an invitation note. If you’re in any doubt, you can check it with the “Check my LinkedIn subscription” button. As a reminder, only people with a LinkedIn Premium subscription can send invitation notes 🤑.
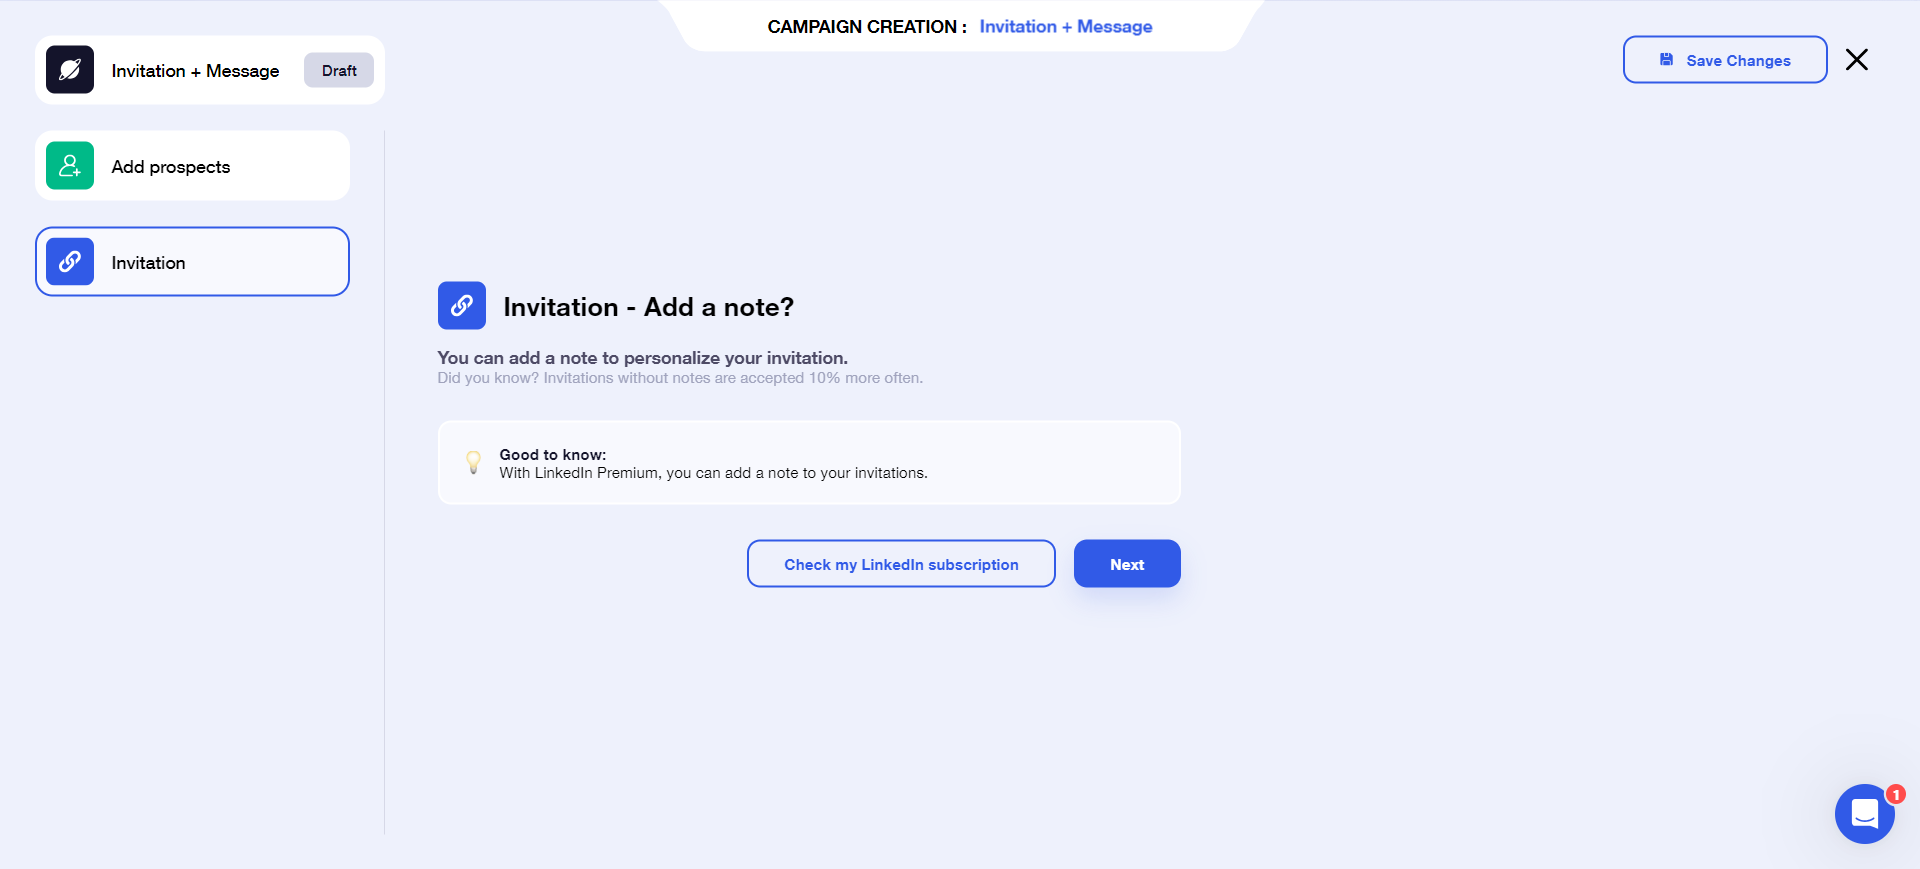
If you don’t have a LinkedIn Premium subscription, you can click “Next” directly.
At this stage, you’ll need to determine how long you want to wait between the moment the prospect accepts the invitation, and the moment Waalaxy sends the message.
💡This delay can be set to 0 days if you wish: in this case, a few minutes after the invitation has been accepted, the message will be sent ⚡.
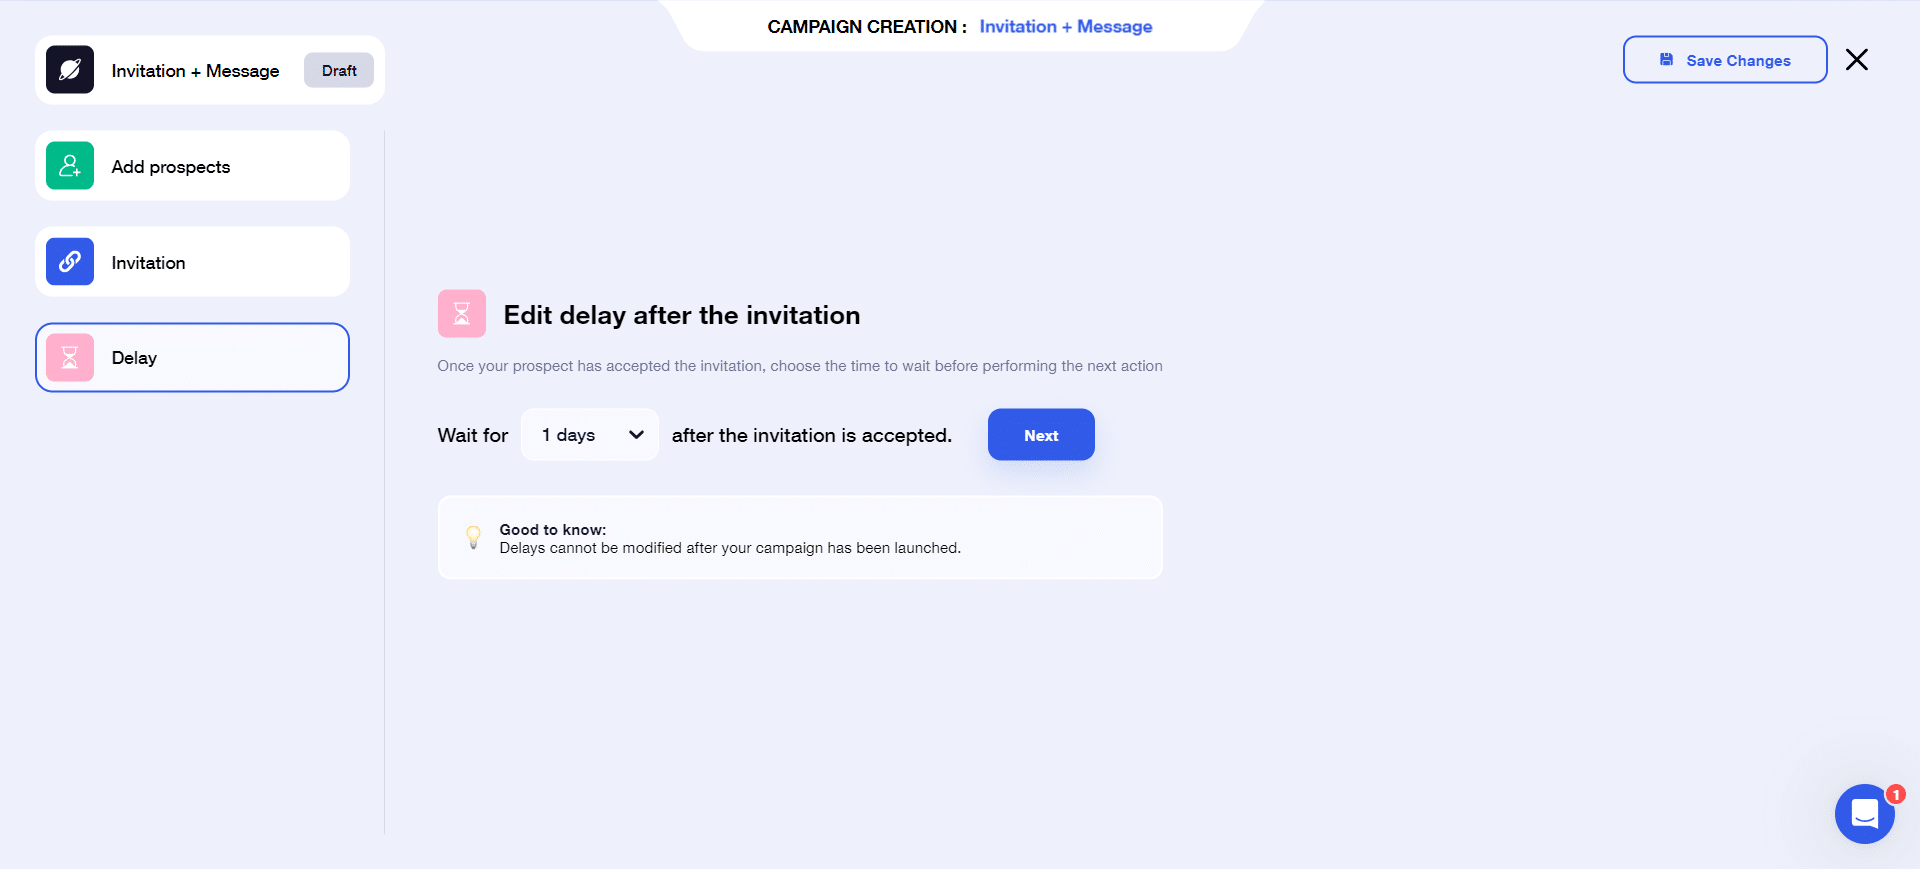
⚠️ To avoid any inconsistencies, this delay cannot be modified once the campaign has been launched. If you wish to modify it, you’ll have to launch a new campaign 😅.
Click on “Next”. This takes you to step 4.
Step 4: Write your message
This is perhaps the most important step in this tutorial. And it’s important, because if your prospect receives this message, it means that your LinkedIn profile has aroused their interest enough to accept your invitation. Sending the message will therefore be decisive in terms of the objective you’ve set yourself by launching this campaign 📩.
You can choose to create a new message (1), in which case you can give this new template a name, and write your content directly in the text box, or use an existing message template (2) if you’ve written messages before:
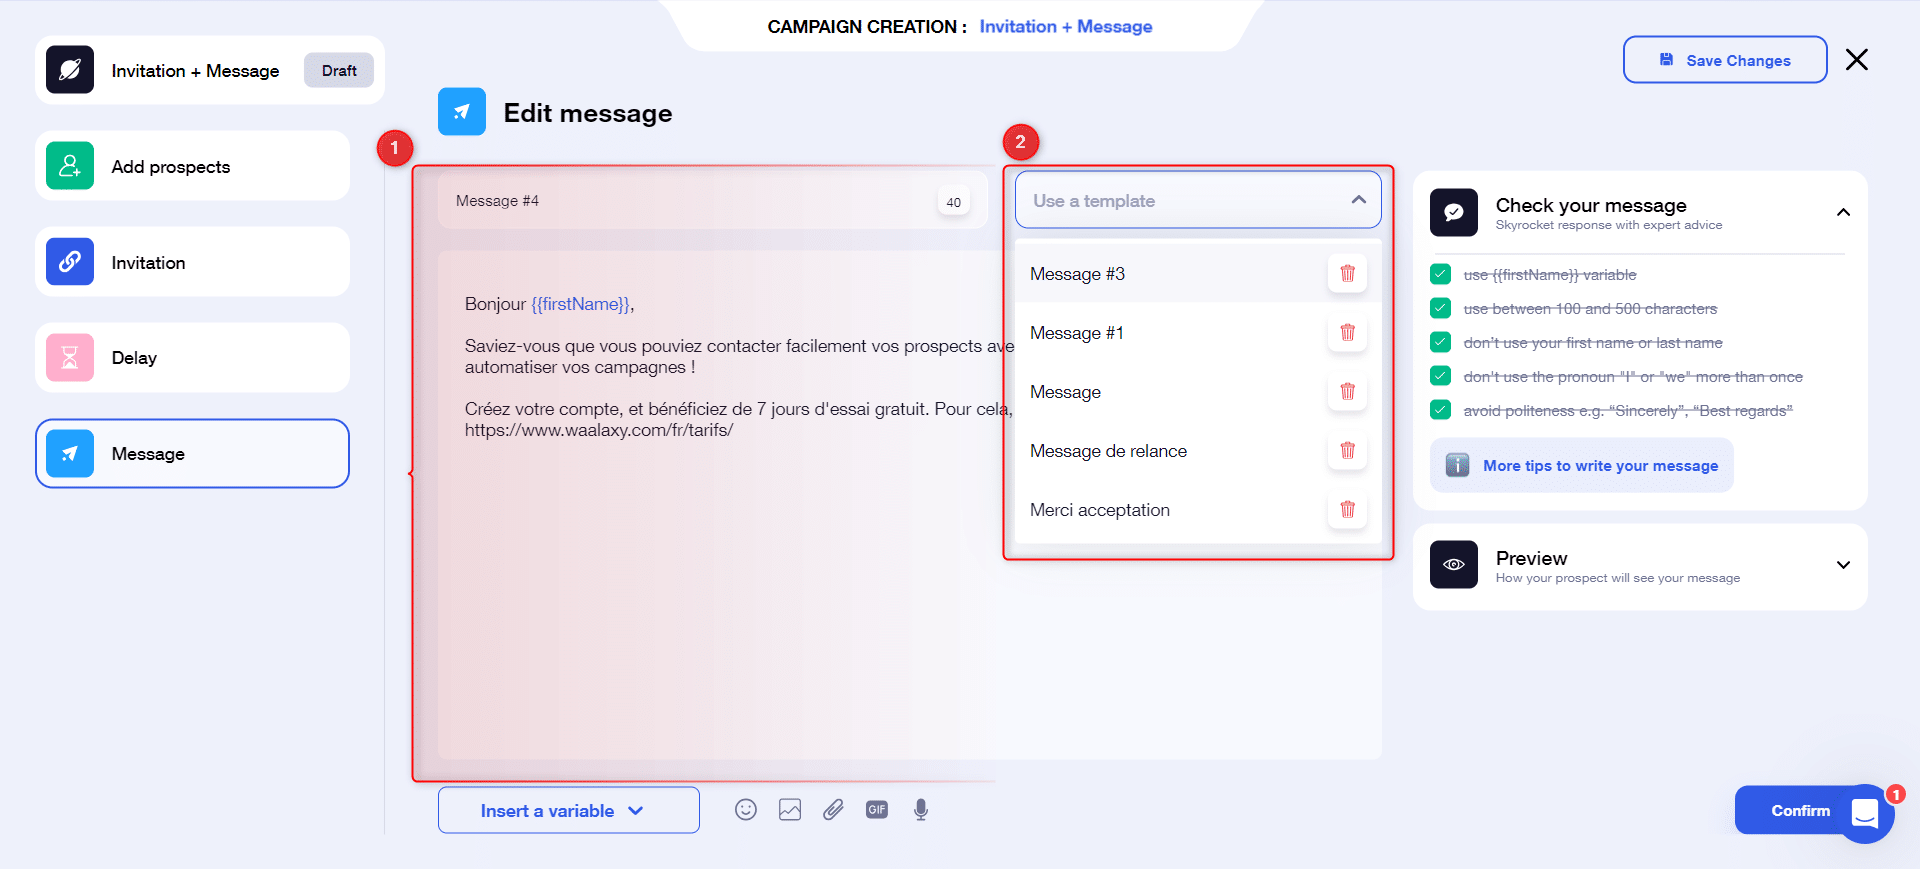
💡Not always easy to figure out what to say in your message, eh? 😥 We’ve put together a checklist to the right of your message, with the main codes for writing prospecting messages. Don’t hesitate to take a look!
Step 5: Launch your campaign
Your campaign is ready 🔥. All you have to do is click on “Launch my campaign“:

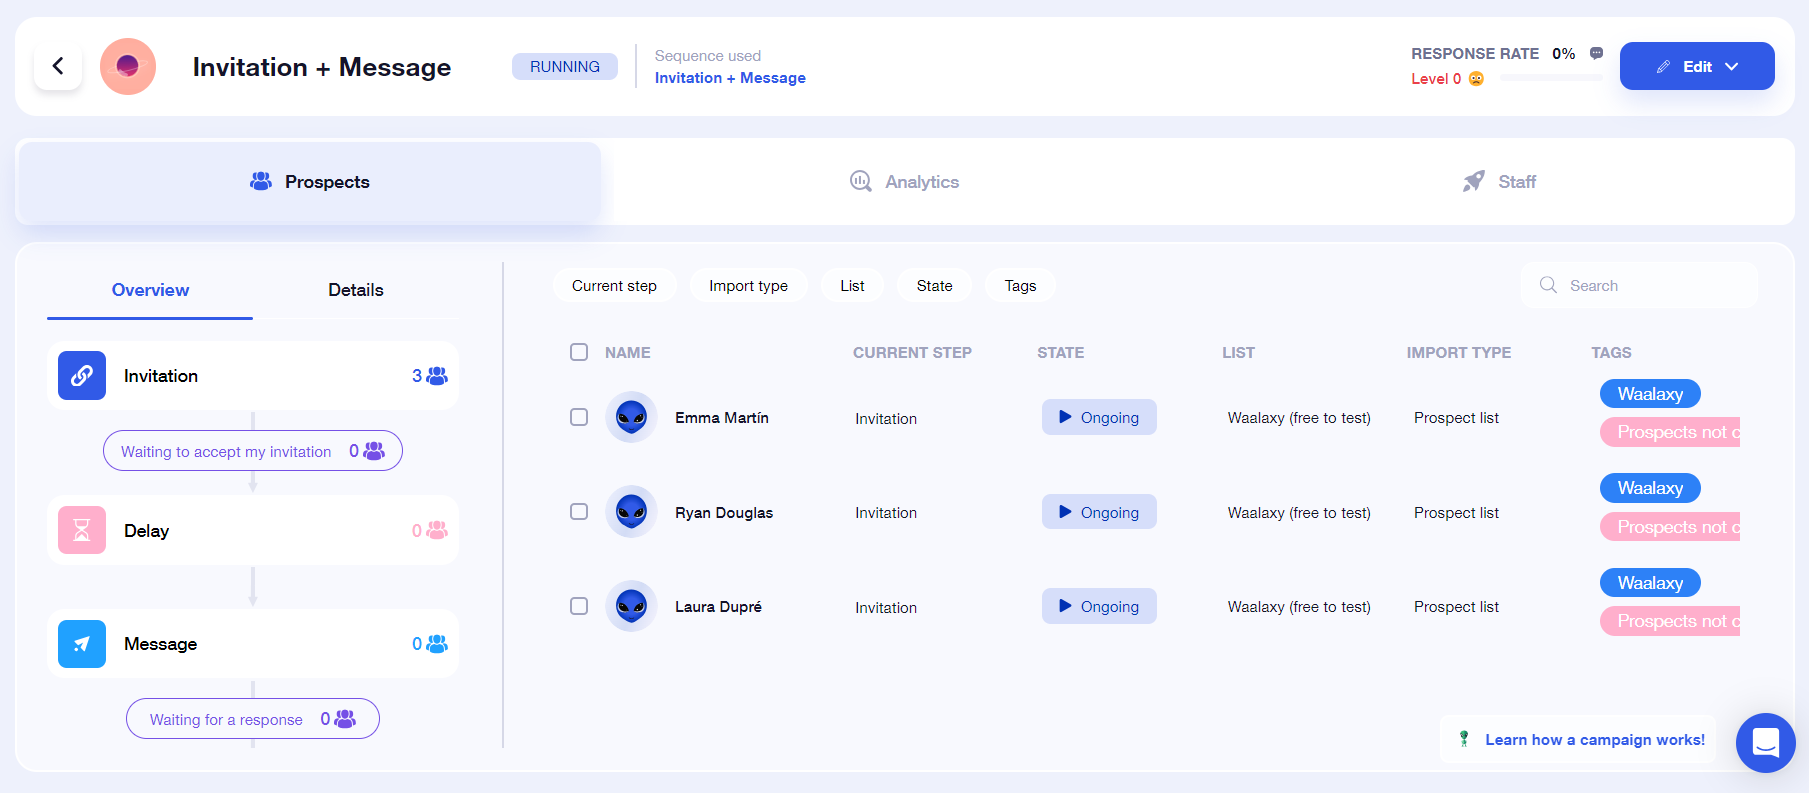
Here we go! 🚀 Your campaign is launched.
Frequently asked questions
Why didn’t my prospect receive the message?
There are 3 main reasons why a prospect may not receive your message:
- He has accepted your invitation and sent you a message: in this case, our security is activated, and your prospect leaves the campaign so as not to create any inconsistencies in your message.
- He took too long to accept the invitation. After an invitation has been sent out, we set a time limit (usually 15 days), during which we wait for the prospect to accept the invitation. If he accepts, he moves on to the next stage; if he doesn’t, he leaves the campaign. In fact, if your prospect accepts the invitation after this period, he won’t receive the message. This is normal: it’s a safety feature we’ve also implemented, to ensure that your campaigns are not open-ended ⏱️.
- An error has occurred ❌. Yes, unfortunately, it can happen. Don’t hesitate to contact our hero support to find out more 🦸.
Can I send several reminder messages?
Of course! We’ve taken the example here of an “Invitation + Message” campaign, but you have the option of sending up to 7 follow-up messages 😱. To find the sequence, remember to use the filters:
And so, following the same logic, your prospect will leave the campaign as soon as he has responded to one of the messages sent 👌.
How do I follow-up prospects who haven’t accepted my connection request?
If your prospect doesn’t accept your invitation, you won’t be able to send him any messages. And, as we saw earlier, after a certain delay, they won’t receive your message, even if they do eventually accept it. If you still want to send them a message as soon as you’ve accepted their invitation, I recommend that you add them to a new campaign.
The Orion template is ideal for integrating prospects who are still waiting to be contacted at a later date. You can define the lead time when creating this campaign.
To find all the prospects concerned, it’s very simple: you can filter your campaign by “Step: Failure”, and apply a tag to identify them easily when you launch the next campaign 🏷️.
Conclusion
And that’s it! You now have all the keys you need to launch your “Invitation + Message” campaign to get in touch with your prospects. Now it’s up to you!