Zoho is a SaaS software suite that includes word processing, collaborative work, and other applications. In fact, it integrates more than 40 tools that allow companies to increase their productivity and optimize teamwork. Today we show you how to sync Waalaxy and ZohoCRM.
Waalaxy x Zoho can be synchronized thanks to Zapier, a tool that allows you to synchronize several applications together. Let’s take a look at it right now. 😍
Do I need a paid subscription to create Zapier Webhooks?
No. You will need a paid subscription to Zapier, or the trial version to be able to create Webhooks.
You will also need a paid subscription, Advanced or Business on Waalaxy to create Webhooks.
Link of the Waalaxy x ZohoCRM
I’ve prepared the Zaps for you that you’ll just have to copy / paste into your browser to automatically resume the pre-completed Zap.
So happy?
➡️ Zap Synchronization Waalaxy x ZohoCRM
Simple. Basic.
Synchronization Waalaxy x ZohoCRM
Step 1. Go to Zapier
- Click on “Create a Zap”,
- Search for “Webhook by Zapier”,
- Under “Event”, select “Catch Hook”,
- Click “Continue” twice, skipping the “Pick off a Child Key” part,
- Copy the webhook URL.
Step 2. Go to Waalaxy
- Click on “Campaign” and “Create a campaign”,
- Filter by the action “CRM Sync” to see all sequences that include this action,
- Select the sequence,
- Fill in the various fields (action, deadline, message content),
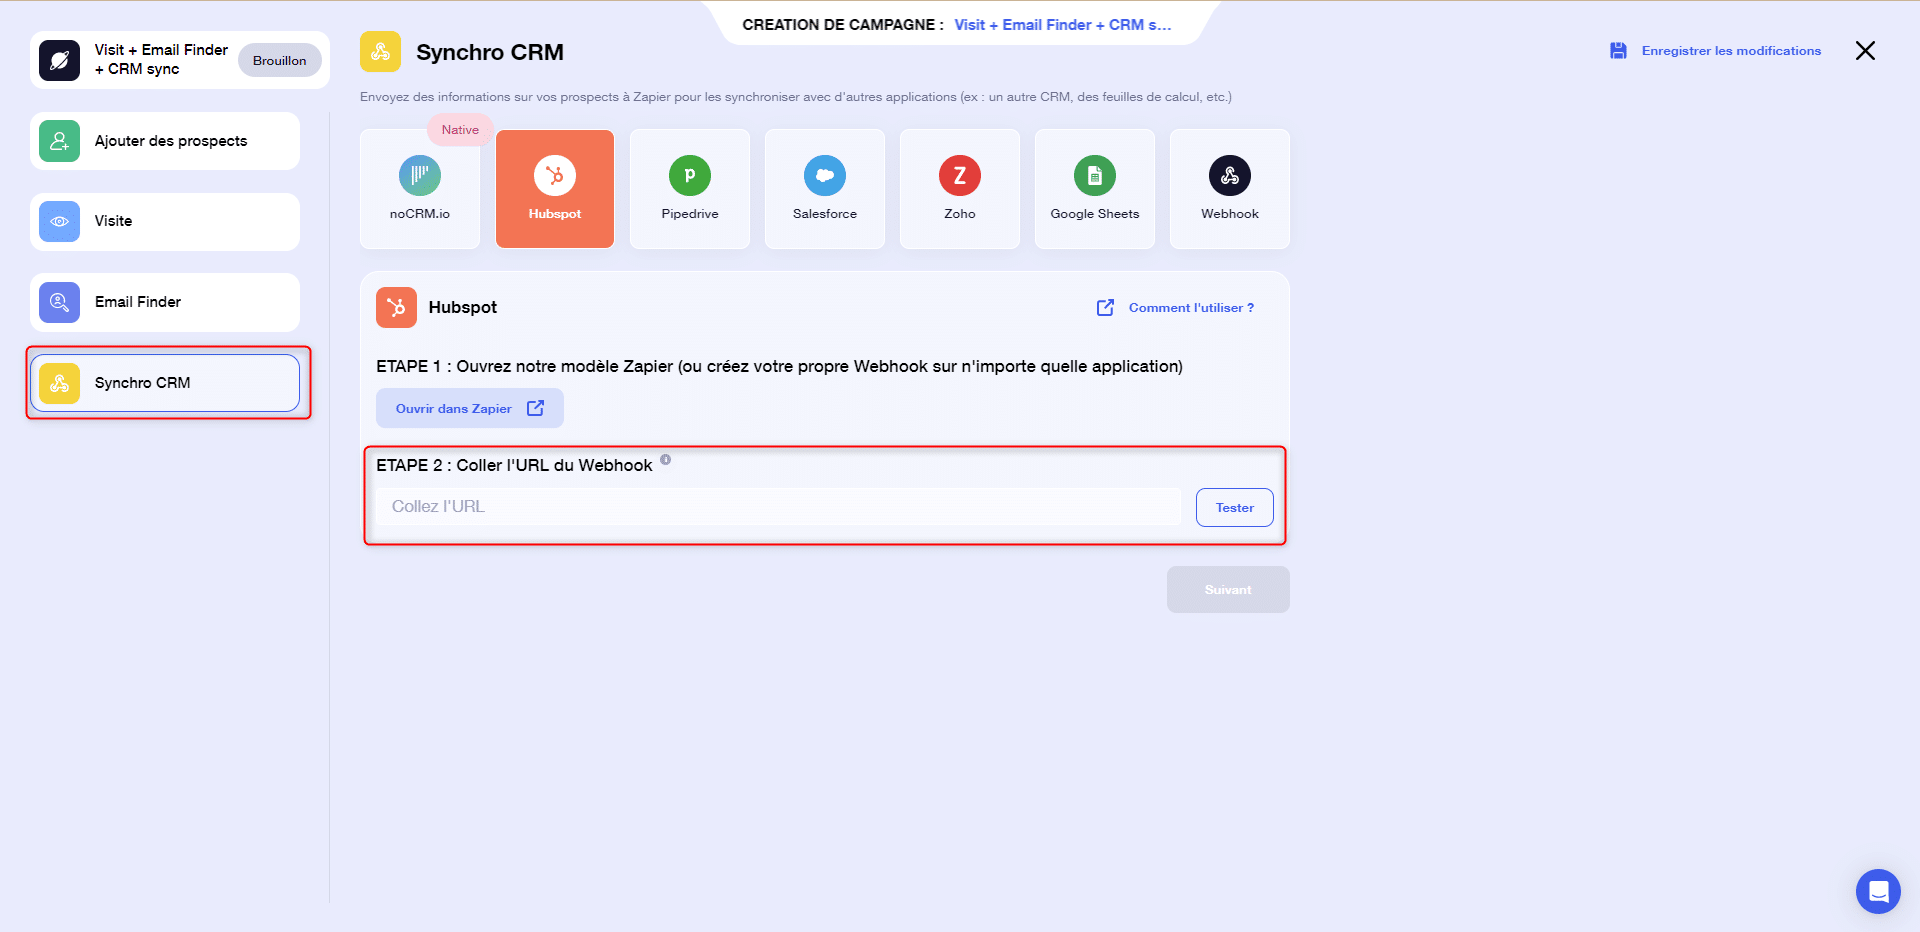
In the “CRM Sync” section :
- Select the CRM that you are going to configure,
- Paste the link of the Webhook previously copied,
- Click on “Test”, then “Validate”,
- Launch the campaign. 🚀
Step 3. Launch the Webhook
- Go back to Zapier, and pick up where you left off.
Now that the campaign has been launched, you can “Validate the Webhook” on Zapier.
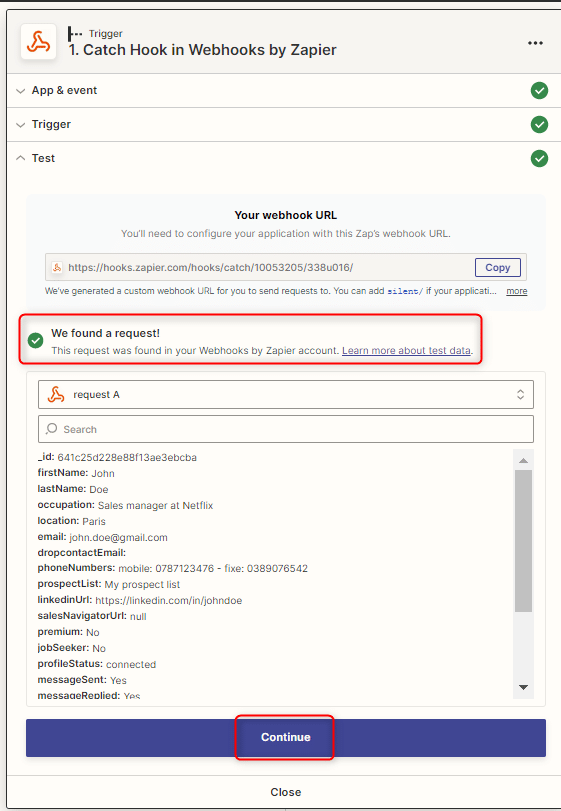
- Click on “Continue”,
Step 4. Synchronise ZohoCRM
- Click on the small “+” and search for “ZohoCRM”.
- In “Event”, search for “Create Module Entry” and click “Continue”.
- Connect your ZohoCRM account.
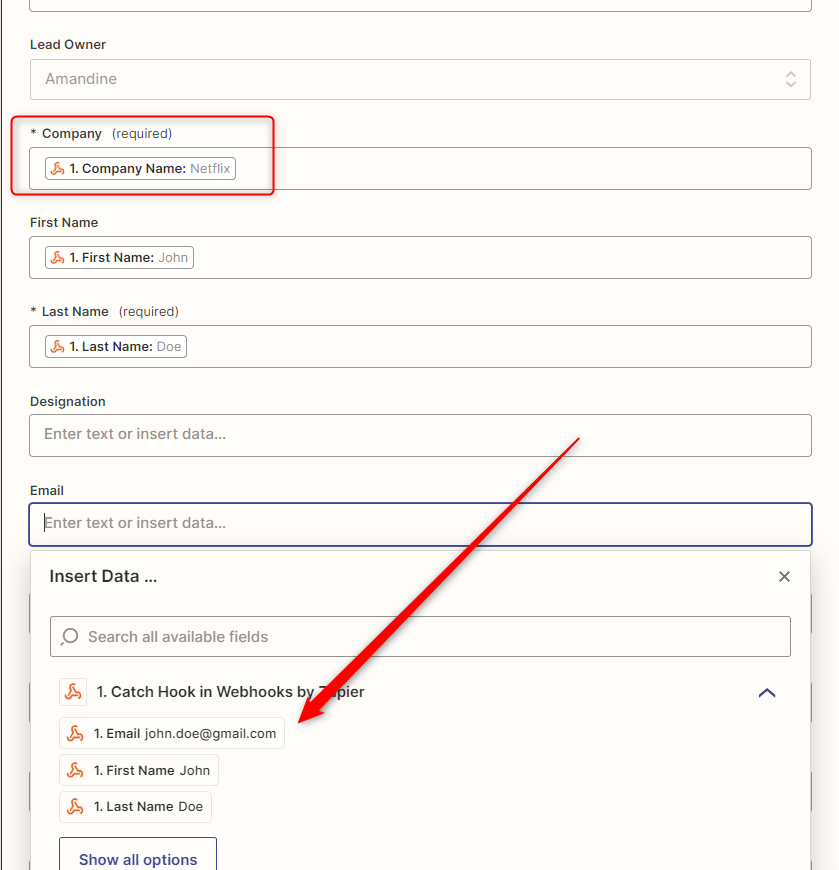
- In the “Action” section, fill in the different fields like this:
- “Module”: you can synchronize the profiles in the “Prospects” or “Contacts” tabs of ZohoCRM.
- “Layout: Standard.
For the rest of the fields, you will simply have to select the variables you want to add:
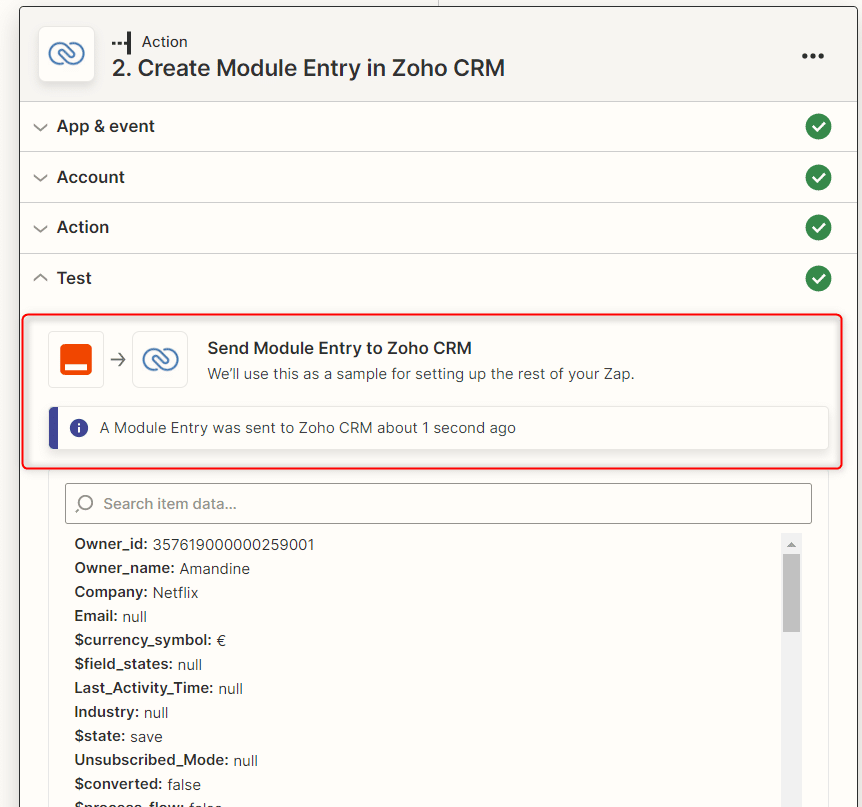
- Click on “Continue”, and “Test Action”,
- You should get a success message,
- Then click on “Publish”:

View on ZohoCRM
Your lead will be sent to the section you have chosen in the Zap: “prospects” or “contacts”:
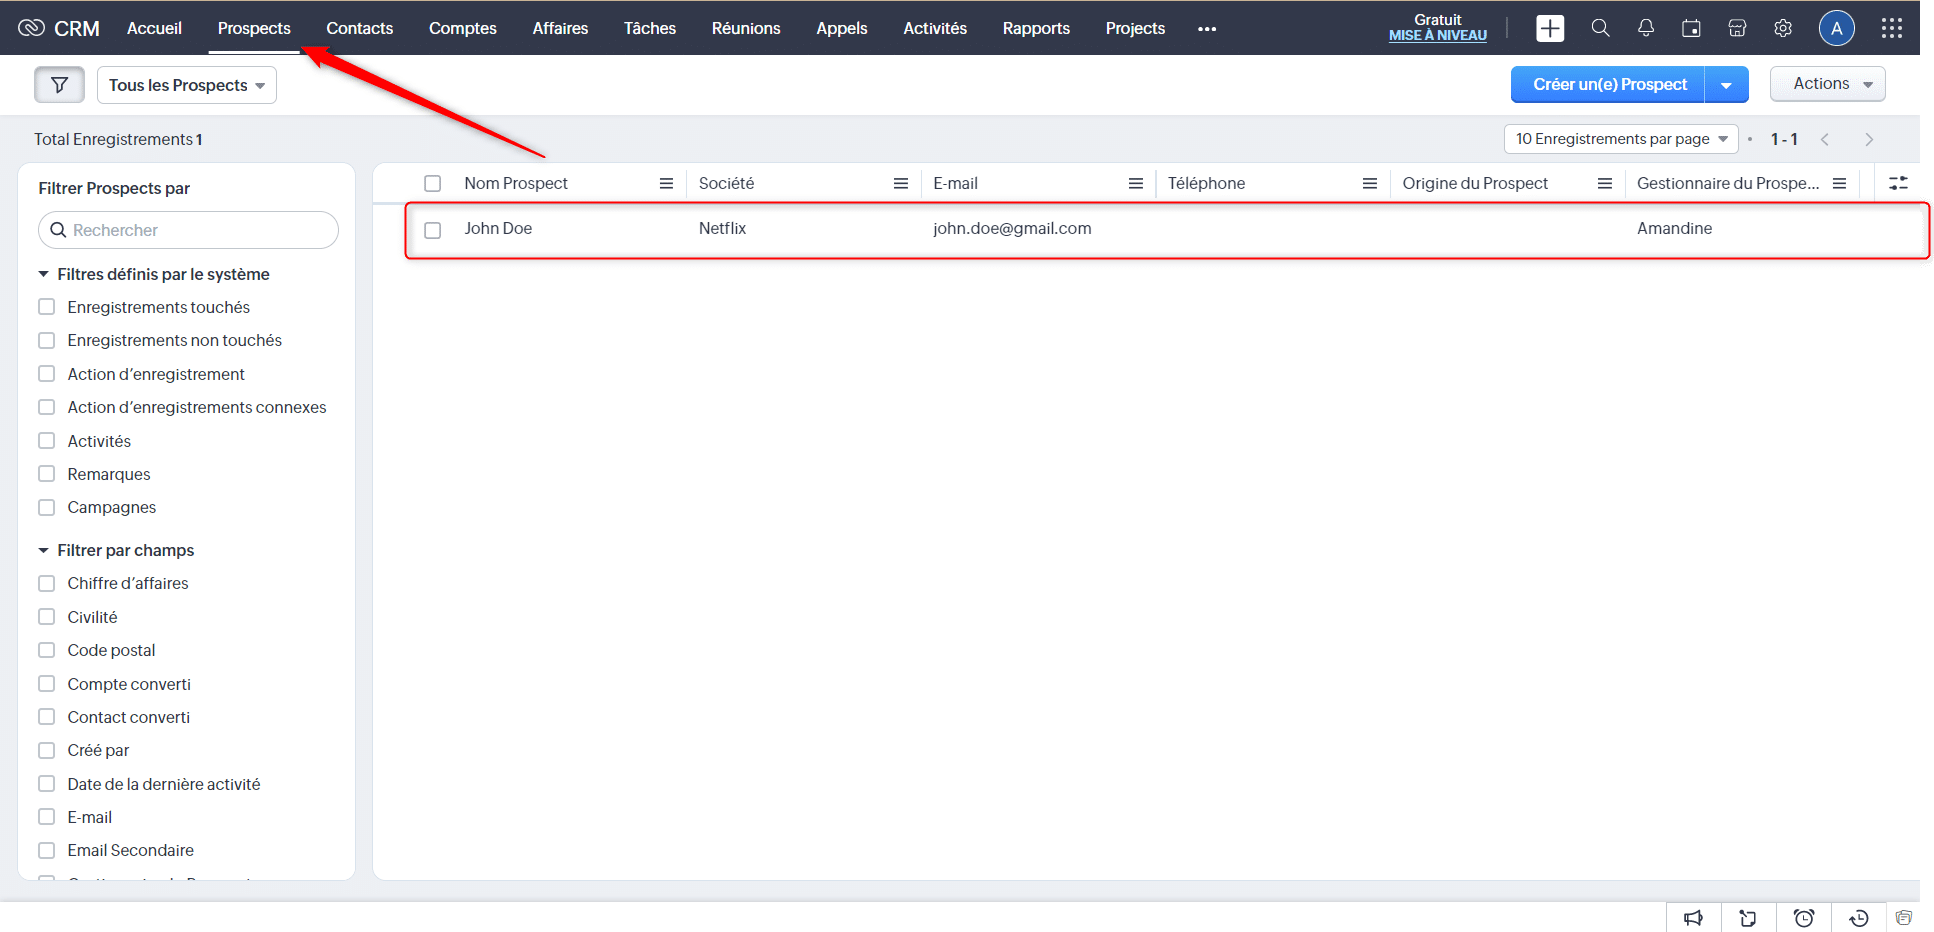
Well done !