- The Use Case: Send a mail to your LinkedIn Contact
- The main steps
- Install the pre-requisite tools
- On Prospectin : Create a Trigger
- On Lemlist: Create a campaign
- On Zapier: Synchro and formatting
- On Google Drive: Preparing a Google Sheet
- Separate prospects on Zapier (Create Spreadsheet Row(s) in Google Sheets)
- Define exit action on Zapier (Add Buddy-to-be to Campaign in Lemlist)
- Go ahead and launch a first test to check that everything is all good
- Key things to note
- Other interesting uses related to the sending of emails
Welcome to our all-in-one tutorial, dedicated to ProspectIn’s new feature, Triggers!
In February, Guillaume introduced you to the Triggers feature: What is the Trigger feature? To learn the basics of this feature I recommend you start with his article.
In this new article however, we’e going to dive deep into an advanced Trigger. This is for the Masters of Growth Hacking, who want to go much further.
The Use Case: Send a mail to your LinkedIn Contact
Let’s say you want to send an automatic mail as soon as a prospect accepts your LinkedIn connection request. It’s a great way to thank them and introduce yourself, using a new communication channel!
Here is the process to automate the sending of this email to your LinkedIn contact:
- On LinkedIn, your prospect accepts your connection request
- On ProspectIn, a Trigger identifies the action and sends the prospect to Zapier
- On Zapier, a Trigger transfers the prospect to a Lemlist campaign
- On Lemlist, a campaign receives the prospect and sends them your email


To be clear: We are using Lemlist in this example as it is optimized for cold mailing and small volumes of leads. However, it is possible to use other tools such as Mailchimp or Sendinblue.
The main steps
To set up the process, follow these 7 steps:
- Install the pre-requisite tools
- On Zapier: Create a Zap
- On ProspectIn: Create a Trigger
- On Lemlist: Create a campaign
- On Paper: Synchro and formatting
- On Google Drive: Prepare a Google Sheet
- On Zapier: Separate prospects and export to Lemlist
Are you ready? Shall we get started?
Hang on tight, it’s gonna be one heck of a ride!
Install the pre-requisite tools
To set up this process you need to:
- Download the ProspectIn extension
- Take at least an ADVANCED or ENTERPRISE subscription plan. This subscription plan is required in order to have access to the Triggers feature. More info on this page
- Create a Lemlist account. You can start with the FREE TRIAL
- Connect your mailbox to Lemlist
- Create a Zapier account. You can start with the FREE TRIAL
- Connect your Lemlist account to Zapier. Zapier will ask you for a Login and a Password. You can find these details your Lemlist account, on this page
- Create an account on Google Drive to have access to Google Sheet
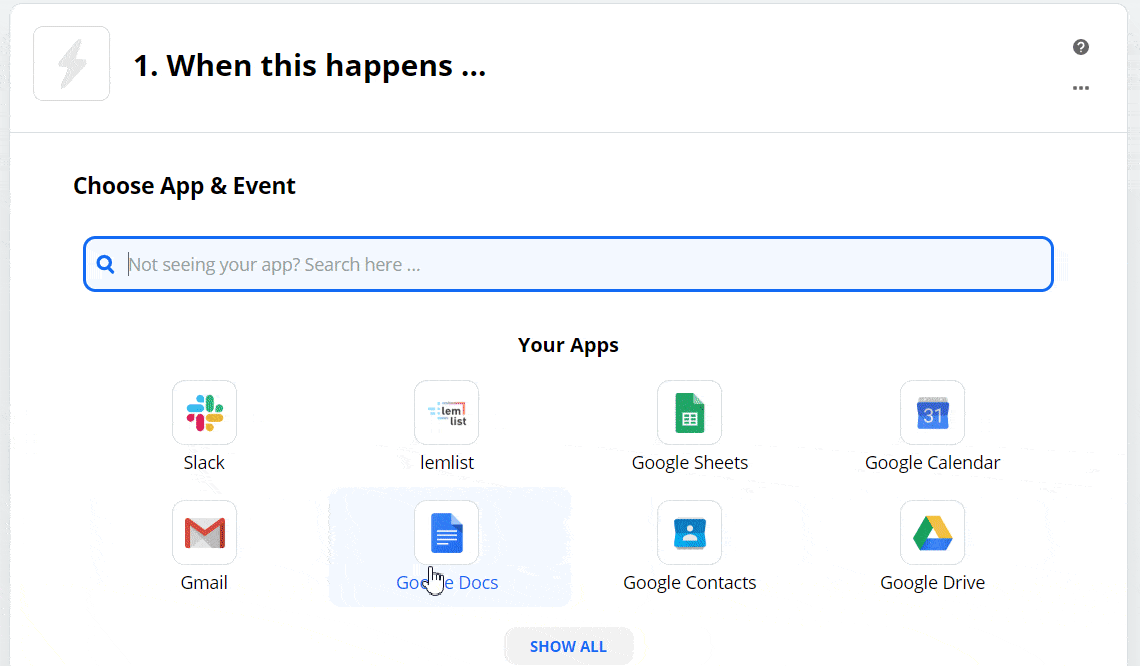
On Zapier: Create a Zap
First, go to Zapier and log in.
- Click on “Make a Zap!
- Name it in the top left corner, for example “Zap Prospectin / Lemlist”.
- In the “When this happens” section of the “Choose App & Event” tab, use the search bar to select “Webhook by Zapier” then “Catch Hook”.
- Click on “Continue”.
- In “Customize Request”, copy the URL from the “Custom Webhook URL” field, which will be used later to create the “Output Trigger” on ProspectIn. Leave Zapier to one side.

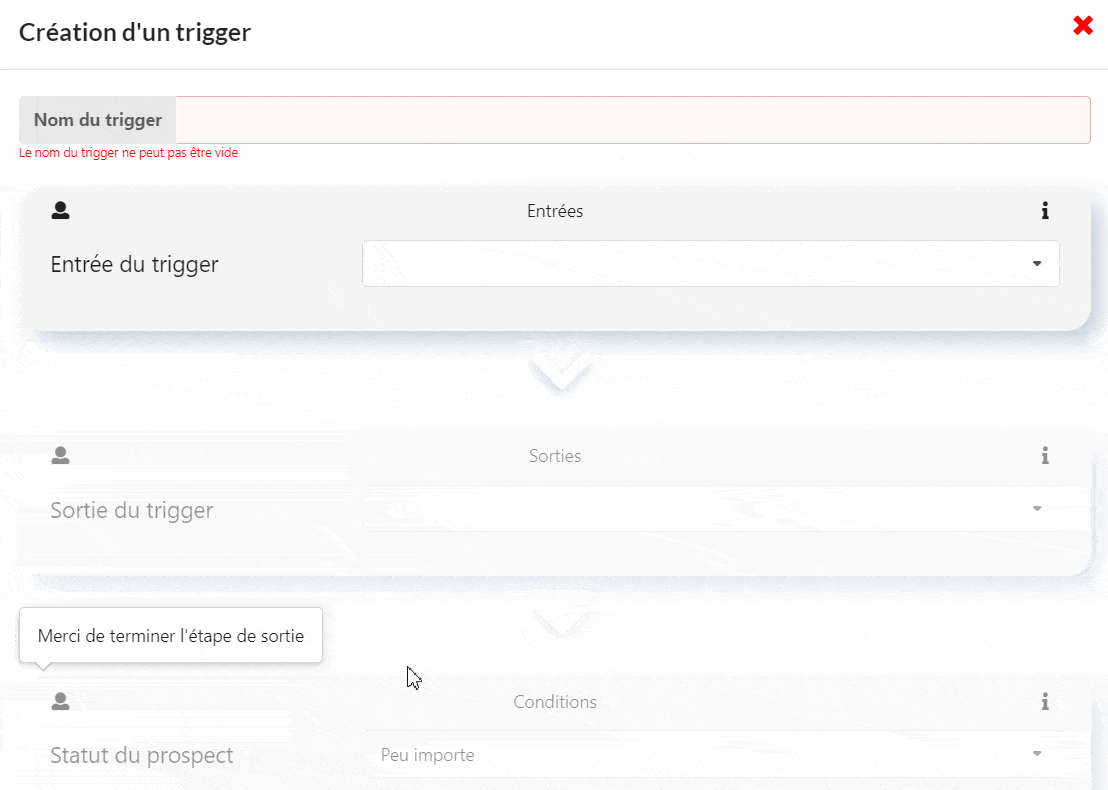
On Prospectin : Create a Trigger
In the “Triggers” menu, create a trigger and give it a name, for example “Trigger send to Zapier if Connection Request is accepted on Linkedin”
Input Trigger
- Trigger input: select “A connection request has been accepted”
- Campaign: choose the campaign for which this trigger should apply
- Note: choose the connection request note for which this trigger should apply
Output Trigger
- Trigger output: choose “Export to your personal CRM (via Zapier)”
- URL of your Zapier hook: paste the URL of your Zapier hook
Conditions
- Prospect status: choose “Doesn’t matter”.
- Already present in the CRM Prospectin: choose “Whatever”
- Click on “save and launch”.
On Lemlist: Create a campaign
Next go to Lemlist and log in.
- In the menu, click on “Campaigns (All)”.
- Click on “Create a new campaign“.
- On the “Name” page, in the “Campaign Name” field, enter a name for your campaign, e.g. “Thank you for accepting my invitation on Linkedin!
- Click on “Next”.
- On the “Buddies-to-Be” page, click on “Next”.
- On the “Messages” page, click on “Blank Email”.
- Fill in the subject and content of your email. This is a good opportunity to thank the person, or/and introduce yourself, or/and let the prospect discover your product/service. You can add a link, a video, an image, a GIF. You can integrate “Custom Variables” thanks to a dedicated picto at the bottom left. Be original, and above all: enjoy yourself!
- Click on “Next”.
- On the “Schedule” page, choose a timezone and your schedule. They are customizable.
- Click on “Next”.
- On the “Options” page, select a Sender, i.e. the mailbox that you have connected to Lemlist and that will send the email.
- To avoid having to validate each email that will send when a new prospect enters the campaign, go to the “Experimental” section and check the box “Review automatically new Buddy-to-Be inserted in the Buddy-to-Be list”.
- Click on “Create the campaign”.
Ok, great! So now you have your trigger on Prospectin which sends info to Zapier, and a campaign set up on Lemlist.
And in-between the two you have Zapier, which essentially links them.
On Zapier: Synchro and formatting
- Still in the “When this happens : Catch Hook” and in the “Choose App and Event” tab, click on “Continue”.
- In the “Customize Request” tab, click on “Test your trigger”. If you used the URL of the Hook to create the Trigger ProspectIn, you should have “Hook A” or “Request A”: these are the test data sent at creation to give Zapier the format of the data to be processed.
- Click on “Continue”.
Format your data on Zapier (Utilities)
- Click on “Do this”.
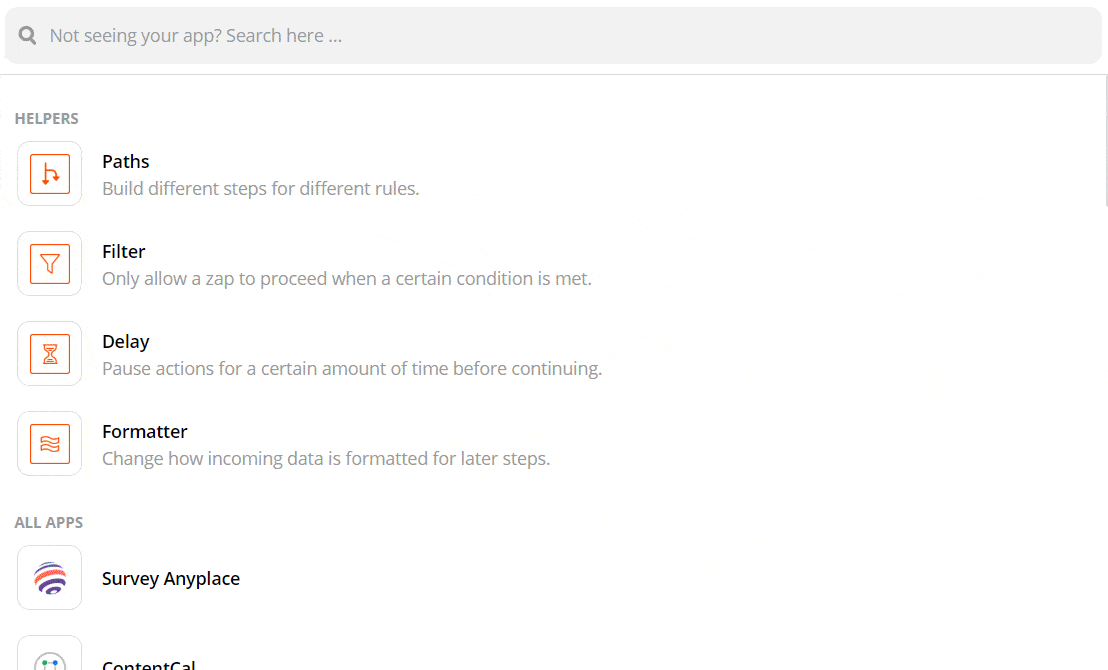
- In the “Choose App & Event” tab, use the search bar to select
- “Formatter By Zapier” and then “Utilities”.
- Click on “Continue”.
- In the “Transform” field, choose “Line Itemizer (Create/Append/Prepend)”.
- In the “Line Item Properties” part, you will define the data that will be exported to Lemlist and the associated keys. Choose the desired data by clicking on the right field and writing the corresponding title in the right field. Click on the “+” to add new ones. At minimum you will need the email, but we recommend you add more info (like First Name, Last Name, Company, etc.), so you can then create “Custom Variables” on your emails in Lemlist. This will allow you to personalize them.
- Click on “Continue”.
On Google Drive: Preparing a Google Sheet
Then go to Google Drive and open Google Sheet.
You will have to prepare a Google Sheet in which Zapier will send your prospects (one line per prospect). This simply allows you separate the prospects, to allow them to be processed individually by Lemlist.
- Rename the file, for example “Zap Prospectin / Lemlist”.
- On the 1st line, fill in the column headings, which must correspond to those you put in your zap, in the “Utilities” part > “Customize utilities” tab > “Line-item Properties” part.
Separate prospects on Zapier (Create Spreadsheet Row(s) in Google Sheets)
Go back to Zapier.
- Click on “+”.
- In the “Choose App and Event” tab, use the search bar to select “Google Sheet”, then “Create Spreadsheet row(s)” > with one (s)
- Click on “Continue”.
- In the “Choose Account” tab, select your Google Account In the tab “Customize Spreadsheet Row”, for the Drive field, choose your Google Drive
- In the “Spreadsheet” field, select the Google Sheet created for this purpose
- In the “Worksheet” field, select the sheet you previously pre-filled with the column headings
- In the “Rows” section, for each field”, click on “Utilities” and choose the name of the corresponding data item
- In the “Send data” tab, click on “Test and continue”.
- If the test was successful, click on “Done editing”
Define exit action on Zapier (Add Buddy-to-be to Campaign in Lemlist)
- Click on the “+” button
- In the “Choose App & Event” tab, use the search bar to select “Lemlist”, then “Add Buddy-To-Be to a Campaign”.
- Click on “Continue”
- In the “Choose Account” tab, click on “Search and select” and select your Lemlist account
- Click on “Continue”
- In the “Customize Lead” tab, fill in each field. To do this, click on the field, click on “Utilities”, click on “Show all options”, select the corresponding field from the list. For Campaign, simply select the Lemlist campaign you created previously.
- Click on “Skip test” then on “Continue”.
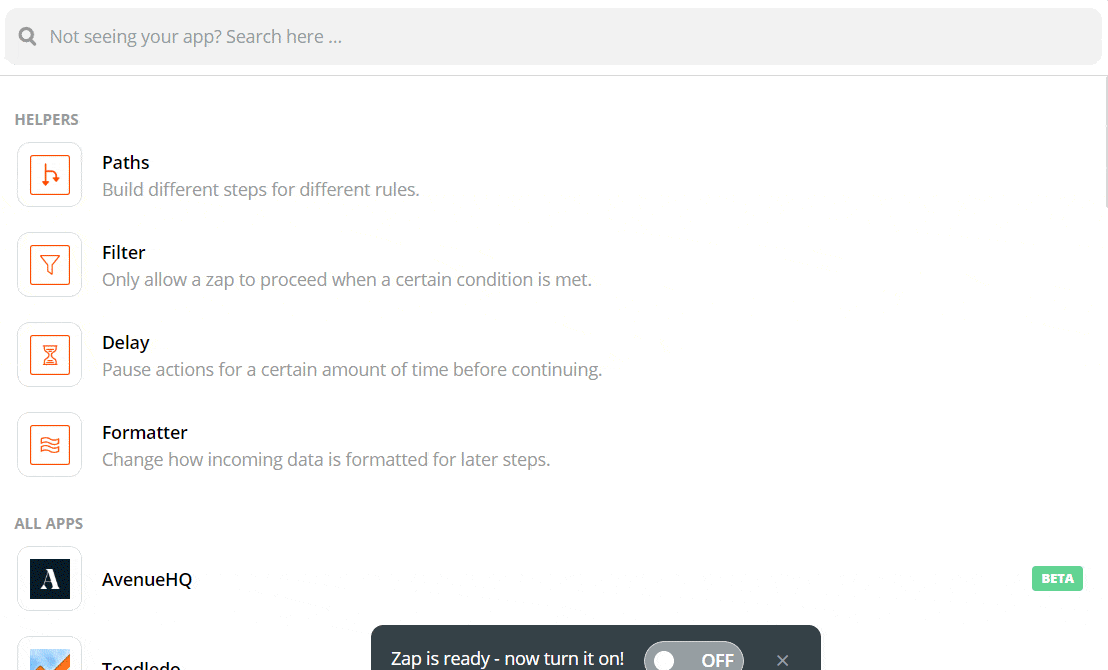
- A pop-up will appear at the bottom to recommend you activate your Zap. Click on “OFF” to switch it to “ON”. Alternatively, the push button is also located at the top right of the page
There you go! Your Zap is now active. You have just made the link between ProspectIn and Lemlist, via Zapier!
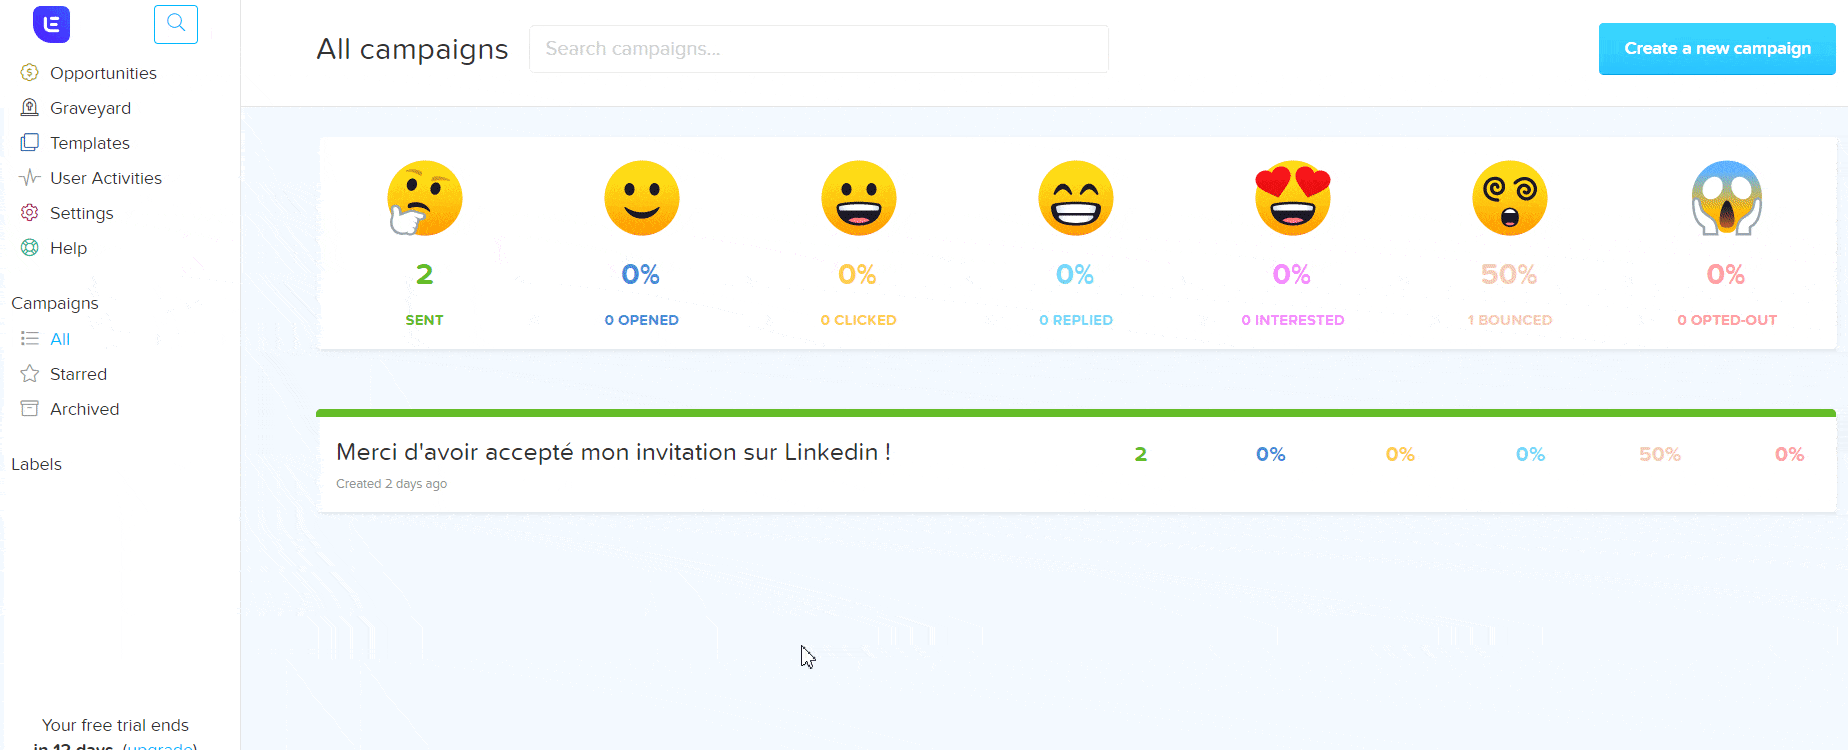
Go ahead and launch a first test to check that everything is all good
- That on ProspectIn your Trigger is active:
- Same for your Zap on Zapier:

- Same on Lemlist, for your campaigns:
![]()
All you have to do is send a connection request to the prospects that are part of the campaign used for the Trigger (with or without a Scenario).
If a prospect accepts your connection request on Linkedin, they will automatically receive… an email!
You will be able to see the email in the mailbox you linked to Lemlist. All within a maximum of 1.5 hours after the acceptance of the connection request.
Key things to note
This will only work:
- For connection requests made via ProspectIn (with or without scenario) but not the ones made directly on LinkedIn.
- If you have the person’s email. On LinkedIn, you only have access to emails of your 1st level contacts (connected). For people who are not part of your network, you will have to use an enrichment tool to get their email address.
Other interesting uses related to the sending of emails
You can replicate this process of reacting by email to many other actions performed by your prospects on LinkedIn. Setting up the process is just a matter of habit!
Here are a few other use cases for this method:
- If one of your LinkedIn contacts comments on one of your posts, send them an email to engage them in further discussion about the subject of the post!
- Send an email to thank a user who just added you on LinkedIn (with automatic acceptance of the invitation this is possible)
- Propose your services by email the minute your prospect accepts your request to be added to their LinkedIn contacts.
- If one of your LinkedIn contacts publishes a post with a specific hashtag, send them an email to exchange on the topic!
If you have any difficulties setting up this process, or if you have a Use Case for which you would like to see a tutorial or read an article, please do not hesitate to contact us directly via ProspectIn’s chat! Karine, Margot or Sofia can quickly answer all your questions about our product!
Furthermore, follow the complete guide on prospecting for your business !
Feel free to leave us a good review on the Chrome Store via this link. Or to read other articles on our blog, such as 10 Trigger examples with ProspectIn!