
- Before you start laying the groundwork
- Prepare the basics of an effective cold mail
- Buy an additional domain name
- Create your email
- Warm up your account: use a “Warmer
- DNS programming (via OVH)
- Make your Whois public
- Reverse DNS
- Add a signature & profile picture
- Subscribe to as many newsletters as possible (Buzzfeed, Francetélévisions)
- Test deliverability with Glockapps
- Apply the feedback from Glockapp
- Conclusion
- FAQs
Welcome visitor, to this intergalactic tutorial. As I write these first lines, we have just launched Waalaxy (the best futuristic tool for automated multi-channel prospecting). Problem: I’ve never sent a cold mail in my life (well, just a few to campsites a long time ago).
Nowadays, the basis of multi-channel in B2B is LinkedIn + email. So I decided to write a complete case study about the launch of my first real multi-channel campaign with Waalaxy. In it, I’ll share my learnings, my challenges, my assumptions and my results. In the first part, I will discuss the “Technical Setup” to start a quality prospecting strategy.
Be careful, this step is not to be neglected: it is the foundation of your b2b prospecting. So if you don’t want everything to fall apart after a few sequences, you’ll have to get your hands dirty. 😁
Before you start laying the groundwork
Prospecting isn’t just throwing emails at the world or adding everyone on LinkedIn, hoping they will bite. In fact, you can get into the top 1% of results by applying some simple rules and following the technical constraints of the channels you use. This first part of the case study may seem a bit tedious.
But it is essential. LinkedIn prospecting gives access to much better performance rates and it is easier than cold email. But the power of the two combined is not to be under-estimated. That being said, before embarking on multi-channel strategies, you must master the habits and customs of each channel independently. Multi-channel tools should not be used to make up for a bad marketing strategy.
It is there to improve the results of already successful single-channel campaigns. Otherwise, you’ll just be prospecting badly, on a large scale. Your domain names will be blacklisted as spam and your LinkedIn account will lose credibility. So now that I’ve made that clear, it’s time to get started.
This article was written in partnership with Scalezia. Scalezia assists startups, scales-up, but also SMEs in implementing the latest growth methods to create sustainable growth and internalize these skills, in order to make the company self-sufficient in the long term.
They also offer a huge range of free content, covering all the important topics of acquisition but also content creation, product market fit research and many other topics essential to grow a business. To access their courses, click here (you won’t regret it).

Prepare the basics of an effective cold mail
Deliverability: what is it and why optimize it?
Deliverability is the percentage of emails that will land in the inbox of your recipients. Here it means:
- that the mail arrives in a valid mailbox.
- that the mail does not arrive in the spam folder.
The first point is directly related to the quality of your email base. No problem for us in this tutorial: the email addreses we will use here will either be LinkedIn emails (therefore verified by LinkedIn), or email addreses enriched by Dropcontact, which we check are valid before sending them on to you.
The second point is a different story.
Because not all email providers have the same criteria to determine if an email should go to SPAM or not, some are more demanding than others. From what I’ve read and understood of the subject, there are 3 main criteria thats affect your deliverability:
- Trust in your domain name.
- Trust in the IP that sends the emails.
- Trust in the email itself.
The confidence in your domain name
When an email gets sent to your recipient, the provider will first look if the email (and therefore the domain) with which you send the email is reliable: is it blacklisted by certain organizations responsible for regulating SPAM on the web?
Has it sent many such emails in the past? Is it possible to easily find out who is sending this email? Is it often reported as SPAM by other users?
Trusting your IP
When we use a cold-email tool, our emails do not leave our computer. They leave from a server somewhere, used by other people. This server is linked to an IP. A kind of identity number. And, depending on what you do and what other users do with their emails, this IP can be blacklisted. In this case, your emails may go directly to SPAM.
Trust in the email itself
SPAM tends to follow a few principles that are easy for providers to spot. So don’t write your email any old way. Certain words or formulations can send you straight into SPAM, no matter what you did before. But don’t worry, we’ll anticipate this to make sure our strategy holds up and optimize our chances of landing in our recipients’ inboxes.
Just one last thing before we get started: this is not an exhaustive tutorial of ways to launch your cold-email campaigns. This tutorial specificallt covers my tools and chooses the optimal method to start my cold-email campaigns, based on the Scalezia course, which is a reference in the marketing field.
I will go as deep as possible in the configuration at each step. If you have never used the tools mentioned in this tutorial, no worries.
We have a complete tutorial to start from 0 without depending on a developer, and we are open to write tutorials for each domain name and mailbox provider to be as exhaustive as possible.
Buy an additional domain name
Yes, you read that right. Let’s go buy a new domain name. Why should we do that? Cold-email is not without risk. Many people don’t like to receive unsolicited emails and depending on the quality of the campaigns we might get our domain name burned.
When this is the case, you should know that it is almost impossible to catch up (the internet does not forget). It would be a pity, if you and your teams already use professional emails on this domain name or if you send newsletters to a customer base, to end up in SPAM systematically.
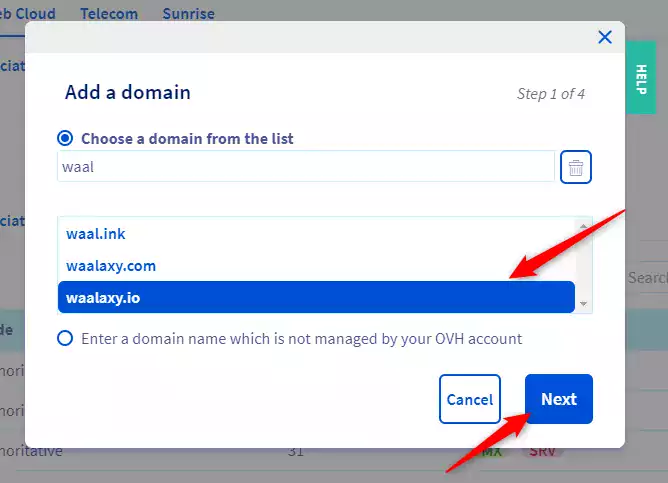
To avoid this, we will take a similar domain name. In my case, my main domain name is Waalaxy.com. So I went to buy: waalaxy.io. It costs me 30€ per year. So really, don’t neglect this step. 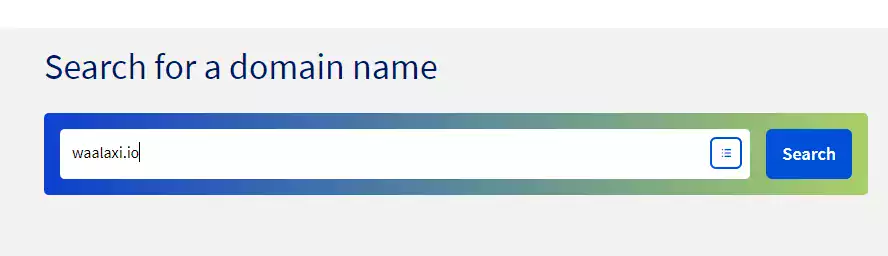 (For those who I already see saying “but I’m not going to buy a domain that doesn’t point to my site, my client won’t find me, panic, help, how am I going to do it”. Guys: we don’t care.
Your prospect doesn’t care. At worst he’ll type Waalaxy on Google and he’ll find us (if you’re not found on your name though, you’ll have to work on your SEO 😂)… If possible, avoid domain names that are too fancy : .paris, .link, .online, .agency … They are not necessarily appreciated by suppliers (and may seem suspicious to your recipients). Choose reliable domain names: .fr, .com, .io, .net, .co or any other domain linked to a country (if possible the country you are going to prospect).
Personally, I use the OVH site because it is there that our hosting and domain name services are centralized. You can also buy it from another provider (like Google Domain, in this case see our case study to configure this service).
Create your email
Personally I am preparing a large-scale prospecting. I’m going to use 5 LinkedIn accounts associated with 5 prospecting emails.
So I’m going to buy licenses and create them in my OVH back-office. For those who do not use OVH, once again I refer you to the Google suite (simpler) or in case you have other constraints related to your business, to your provider. Don’t hesitate to contact us if you want us to add documentation related to your provider, so that we can cover as many cases as possible in our tutorials. However, here, I will create my emails.
- I go to my OVH customer account.
- Then in my backoffice.
- I order new pro mail accounts (once again, you will have to pay €12 annually to have an email address, but don’t get put off by this cost. Think Return on Investment and tell yourself that this cost can be amortized with a single email that will go in the inbox of the right recipient 😉).
Associate the email with your domain name (it often takes a few minutes before the domain name is purchased).

Configure the mail you just bought.
After a few minutes, the email should be configured and operational. If you have followed this tutorial, you will be able to access the email in question by clicking this link.
Warm up your account: use a “Warmer
As we said earlier, email providers look at what you have done before with your email and domain name. When it is brand new like we just did, they have no history. So if from one day to the next you’re sending hundreds of emails a day, they’re not going to like it. To avoid this, there is a method that consists in “warming up” an email account : Email warm-up. Two options:
- Warm up your email manually: this means creating a dozen or even twenty emails on different providers and then exchanging emails with each other, systematically removing them from spam and marking them as important.
- Use a tool that automatically does this for you.
At Waalaxy, we’re not the type to do things manually. At least not this one. So we’ll choose option 2: using a “warmer”. Regarding this, you have two that stand out:
- Lemwarm (by lemlist).
- Mailwarm.
We will choose here Mailwarm for a simple reason: Lemlist is our direct competitor so we will not present here how to use it (but it is a very good tool and it costs less if you do decide to try them out). Waalaxy will soon integrate natively this Mailwarm functionality as well, in order to facilitate the setup for our users.
How does Mailwarm work? It’s pretty simple. The tool will send mails on your behalf to other users, where the mail will be automatically categorized as important. And vice versa for other users. And those with a daily volume that increases day after day.
First of all, let’s create an account with MailWarm . Unfortunately, there is no free trial, you have to go directly to the cashier. Personally, I took 5 accounts in monthly plan, in the hopes that Waalaxy’s Warmup version will be developed by the first renewal. 🙏. Once you sign up for the subscription, you get to this page.
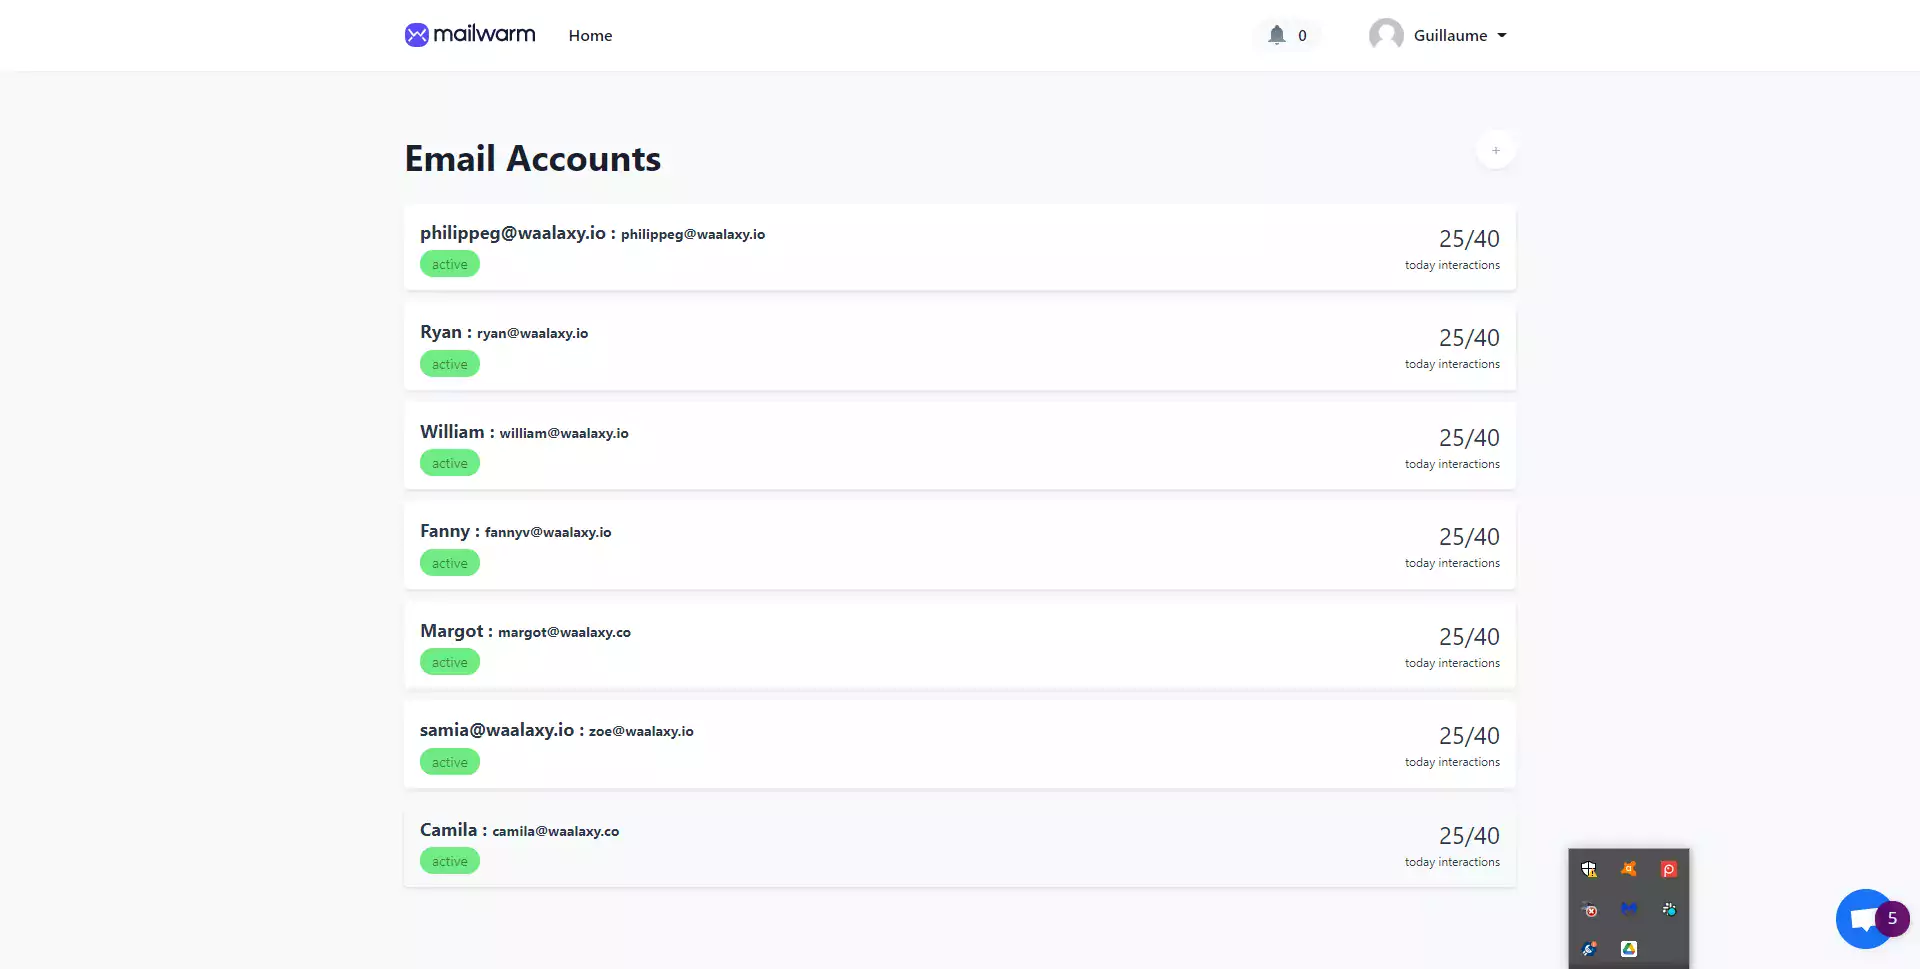 We will add an account in the top right corner.
You must then enter the SMTP parameters (which will allow Mailwarm to access the mailbox and manage the emails for you). In our case, it is the OVH parameters. If you are using another mail provider, just search on Google “provider_name SMTP settings”. 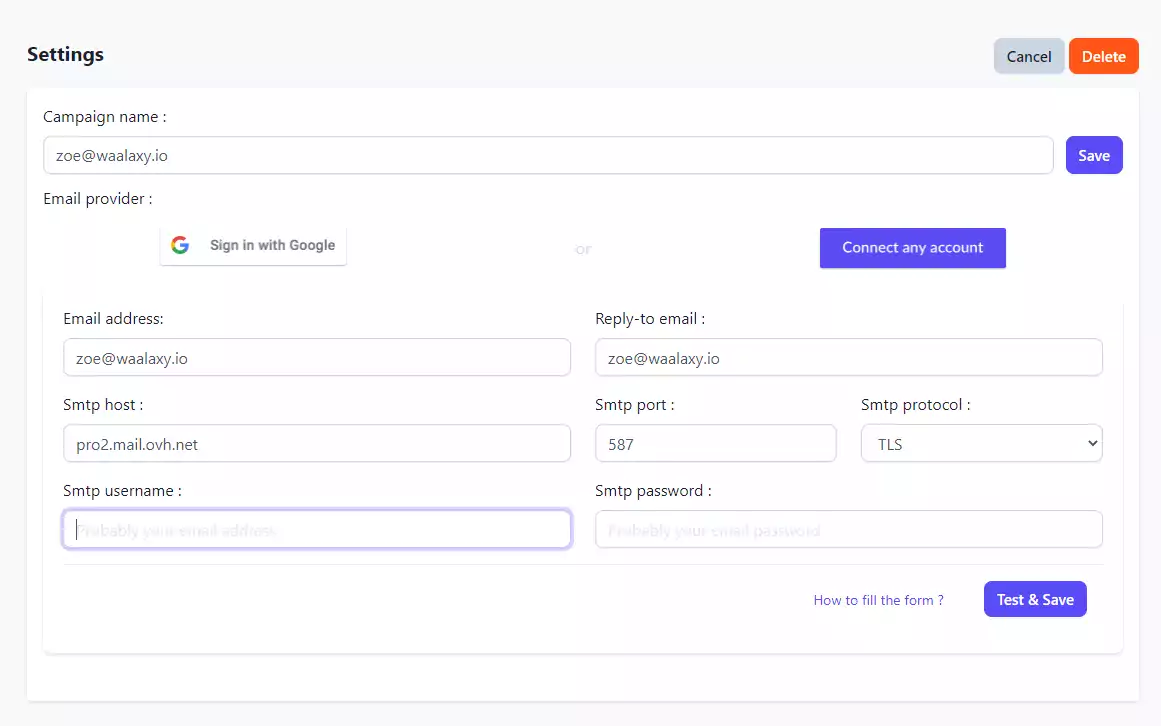 Small counter-intuitive point: the “username” corresponds to the email address (and name refers to the name that will be displayed as is often the case in SMTP settings). Once the configuration is done, you access a page with the actions to be performed and carried out by mailwarrm on your mail account.
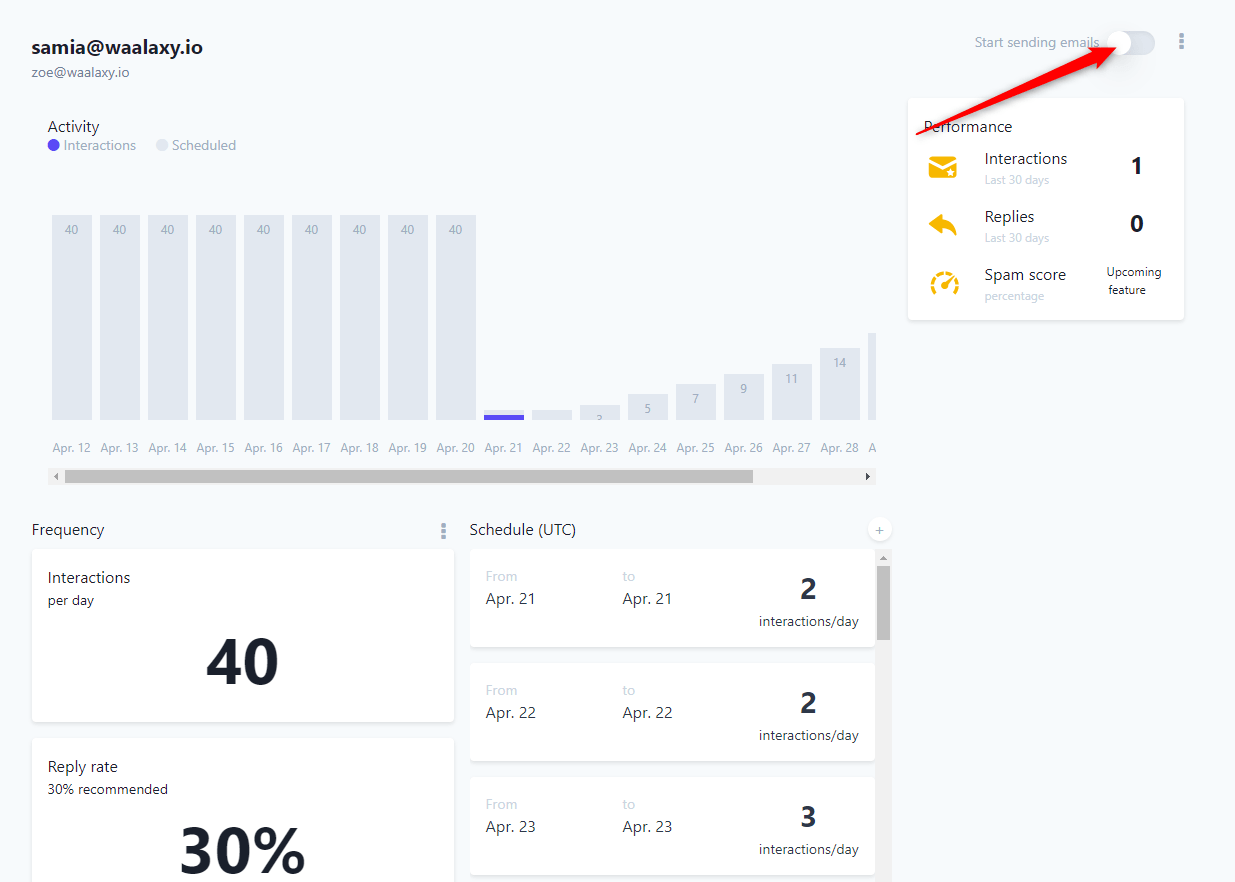
Personally I left all the parameters on default and activated the system. We decided to start slowly, with 2 mails per day, to reach 40 after about 2 weeks. Yes, to launch your first real cold mail campaign, you will have to exercise some patience. But even after that is done, there is still some work to be done in order to finish setting up. So for now you’re going to let Mailwarm get to work and move on to the next step.
DNS programming (via OVH)
No, don’t go away. This barbaric name hides a very simple manipulation…
Provided that you have access to the domain name provider. In my case, I’m still with OVH. So I’ll show you how to do it for OVH. If you use another provider, you’ll have to find the documentation on the web.
Let me know your needs directly on Waalaxy’s support chat. We’ll try once again to create a complete doc for these configs. The DNS settings are what all the emails you will send go through.
A kind of identity card. And to attract the trust of the mailboxes, it’s better to have all your papers in order. There are 3 key configurations to do:
- SPF, for “Sender Policy Framework”.
- DKIM, for “DomainKeys Identified Mail”.
- DMARC, for “Domain-based Message Authentication, Reporting & Conformance”.
 I’ll be very honest: to this day I don’t have the hindsight on the implication of these different configs and their importance.
I followed the Scalezia course step by step and here I’m essentially transcribing it with my use case. What is sure, is that I have blind trust in terms of cold mail in Scalezia and we will try to implement these different configurations.
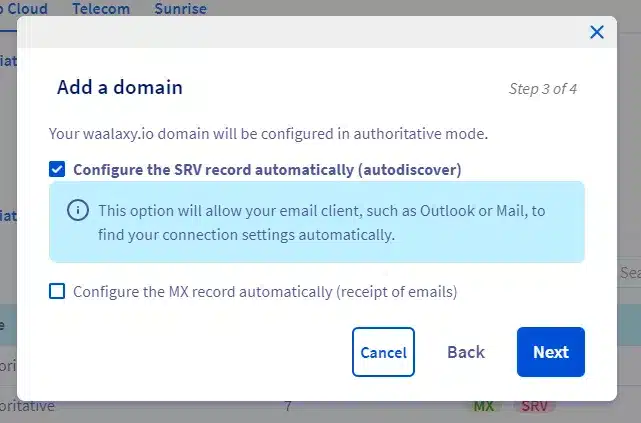
If you have opted for Gsuite for your emails, good news, SPF and DMARC are already set by default. In my case, I use OVH and this is not the case. I found a tuto that shows how to do the configuration. I’ll provide you with the link, and of course I will explain everything, so don’t worry.
Step 1 : SPF configuration
To configure the SPF, if you use the basic services in terms of OVH emailing, it’s pretty simple. You have to go back to the admin panel of OVH, choose your domain name and go to the DNS zone. Then follow this little tutorial with the default configuration of OVH.
Step 2 : DKIM configuration
EDIT: after hours of research, it seems that the pro mail service of OVH does not allow you to set this up. If any motivated people have solutions, I’m a taker 😁
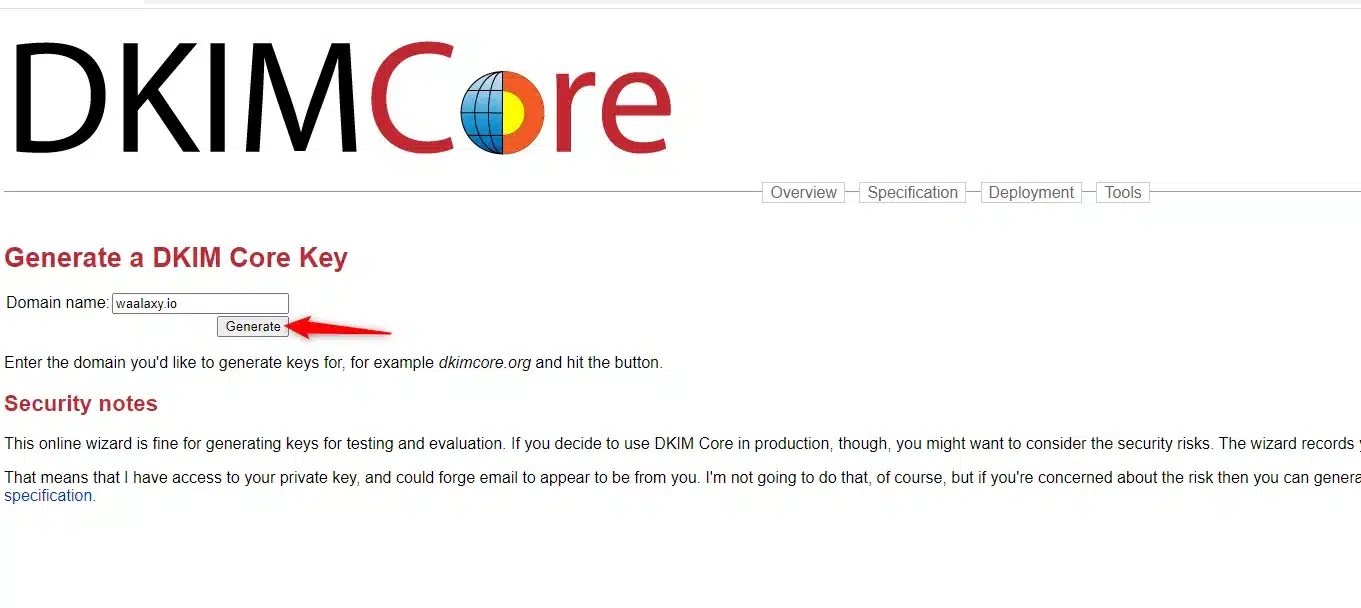
The DKIm is used to identify you as the owner of the mail you are using (at least that’s what I understood after some reading on the web about it). To start with you need to generate a unique key that will serve as an identifier. For that, go to this site. Generate a key for your domain.
 Then copy the obtained key.
  Go back to the OVH management interface, select your domain name and go to “DNS Zone”. Add a DNS entry, in TXT then enter the subdomain provided by the key generator and the key value as shown in the following GIF.
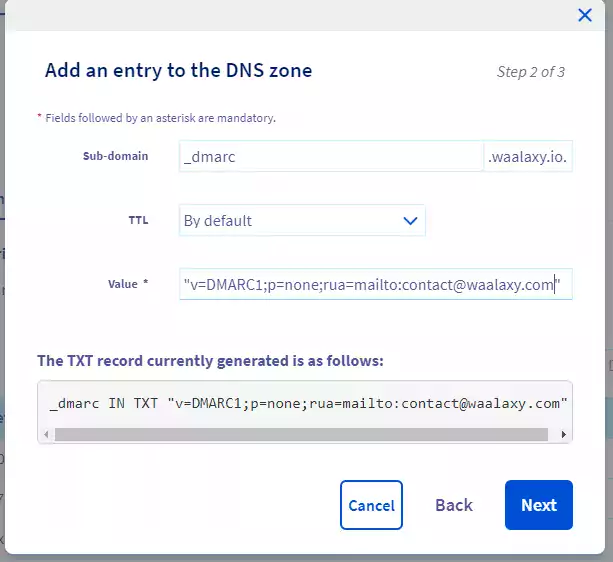
Step 3: DMARC configuration
This is almost the end, don’t worry. Just kidding. But it’s almost the end of this part about DNS. We still have to configure DMARC (which can only be configured if you have done the previous two steps. It depends on it).
This last configuration is quite simple. It consists of redirecting the mails that fail to ro a company mail. You have to create a new entry in TXT, enter a subdomain “_dmarc” and add the following text in the value.
"v=DMARC1;p=none;rua=mailto:email@domain.com"
By replacing the email by the one that will receive the reports (you can put the one you use to send them for example).
Make your Whois public
“Whois” is the identity card of your domain name. It contains information about the owner of the domain and how to contact him. By default it is anonymous.
But for email providers, a public Whois is a guarantee of credibility and quality. So we will make it public. Still on OVH, you have to go to the domain name management page, choose to modify the “Whois” and set everything to “Display”.
 It’s as simple as that!
Reverse DNS
More DNS? Yes. But I promise, this is the last one. Reverse DNS is a traceability tool that allows you to be sure of the identity of the sender of an email, by using the IP address to trace the domain.
This measure is particularly interesting, because it allows to differentiate from spammers, who use a deliberately erroneous IP. The good consistency between IP and domain is indeed measured by a protocol called Reverse DNS Lookup, which, when receiving an email sent by an unknown sender, will make sure that the Reverse DNS is correctly configured.
If this is not the case, the chances of being blocked or delivery into your spambox are very high. Unfortunately, I haven’t figured out how to do this with OVH yet. Promise I’m working on it 😅
If you find out how to do it with OVH, please let me know!
Add a signature & profile picture
Silly but essential. In order for your recipients to be able to identify you, you have to add a profile picture and a signature to your emails. If you use OVH, here is the procedure:  Be careful however to use a picture of you and not a logo. The algorithms are intelligent and will notice it without any problem.
Then add a signature:  The signature should contain as much info as possible, identifying you by avoiding fancy stuff: no HTML, no logo, minimal formatting. Scalezia even advises against putting a link, but since my goal is to get my reader to visit the site, I’ll break this rule and put one.
This is how my first profile will become a Business Developer. 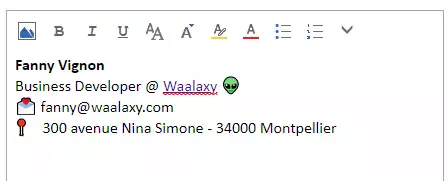
Subscribe to as many newsletters as possible (Buzzfeed, Francetélévisions)
To send a positive message to suppliers by telling them “Look, I’m not a spam account that has just been created to contact the whole world and sell them illegal products to enlarge their penis”, you’ll have to show them that you’ll have to have regular behavior, in addition to heating your account.
For that, you just have to subscribe to a lot of newsletters.
Step 1: subscribe to all Buzzfeed newsletters
It’s easy to do. Go to Buzzfeed , enter your email address and subscribe to all the newsletters. Since I’m a slacker, I have a little bit of a developer background and I have to configure at least 5 accounts, here is a piece of code that will select all newsletters in one go.
var labels = document.getElementsByTagName(‘LABEL’); for (var i = 0; i < labels.length; i++) { labels[i].click() }
To be entered in the console directly (Right click on the page => Inspect => Console => Copy the code). 
And because uncle Toinon is really nice (or really lazy), he also made a piece of code to validate the subscription to all the newsletters (only valid for the OVH Pro mailbox). You have to wait a few minutes until your subscriptions have been taken into account.
You will receive one email from Buzzfeed per newsletter, that is 46. For each one you have to confirm your email address by clicking on a button. When you have received all the confirmation emails (you must connect to your professional email address of course), scroll to the bottom of the inbox to load all the Buzzfeed emails and then you can add this piece of code in the console:
var elements = document.querySelectorAll(‘div[autoid=”_lvv_3″]’); var button; for (var i = 0; i < elements.length; i++) { elements[i].click() await new Promise( resolve => { setTimeout( () => { resolve() },500) }) button= document.querySelectorAll(‘div[class=”x_button-container”]’) console.log(button); if(button.length>0){ button[0].firstElementChild.click()} }
When you click “Enter”, the magic will happen. You may have to repeat the operation. (Only works for the OVH mailbox ).
Beware Chrome will probably block the opening of all tabs. For that you must allow the tab to continue to open other pages in the top right of the browser when it occurs. Once all the tabs have been opened, another trick to close them quickly: you put yourself on the first one and press Ctrl + W as many times as necessary.
Step 2: Update your LinkedIn account with the new email and activate all the notifications
When all LinkedIn email notifications are activated and you are prospecting with the account, it will send you at least 10 emails per day. So we will update the LinkedIn account we are using with this new mail and activate all the notifications. Go to LinkedIn’s settings page, section “Identification and Security” and enter the new email. 
We will have to check it directly from the address and then change it to“primary email“. Then go activate all email notifications. Sorry, but this time I didn’t make a script…
Go to the LinkedIn email communications page. Switch everything to “On” and anything that can be switched to“Individually“, please do.
Step 3: Create rules to make it readable
After all this you’re going to get a lot of emails. A lot of them. So we’ll create two simple rules to keep your mailbox readable: redirect newsletters and buzzfeed emails to a dedicated Folder. First of all create an“anti-spam” folder (or whatever name you want, it doesn’t matter). 
For that in your pro mail interface, go to Settings => Rules => Add a rule.  Make a rule for mails coming from : newsletter@buzzfeed.com pleaselikeme@buzzfeed.com hellomobile@buzzfeed.com messages-noreply@linkedin.com messaging-digest-noreply@linkedin.com cocoabutternewsletter@buzzfeed.com jpg@buzzfeed.com invitations@linkedin.com
From now on, all emails received from these two addresses will be redirected to the file. So as not to miss the response of your future prospects.
Bravo !
Really, if you are still here and you have been able to apply everything without any problems, bravo! From now on, you’ll have to wait a little while. Let your mail be well heated. In the meantime, you can move on to part 2 of this case study: preparing your LinkedIn strategy.
Test deliverability with Glockapps
Once a few days have passed, your email has been warmed up: it has received a lot of emails, you’ve responded to a few and sent other emails and the DNS configuration has propagated well.
It’s now time to go and test our deliverability with Glockapps, a tool that will analyze our domain name and give us recommendations on what’s the latest hype. On Glockapps you will have a trial for 3 audits, after that you have to pay. To perform the test, you have to click on “Start test” once you are on the home page.
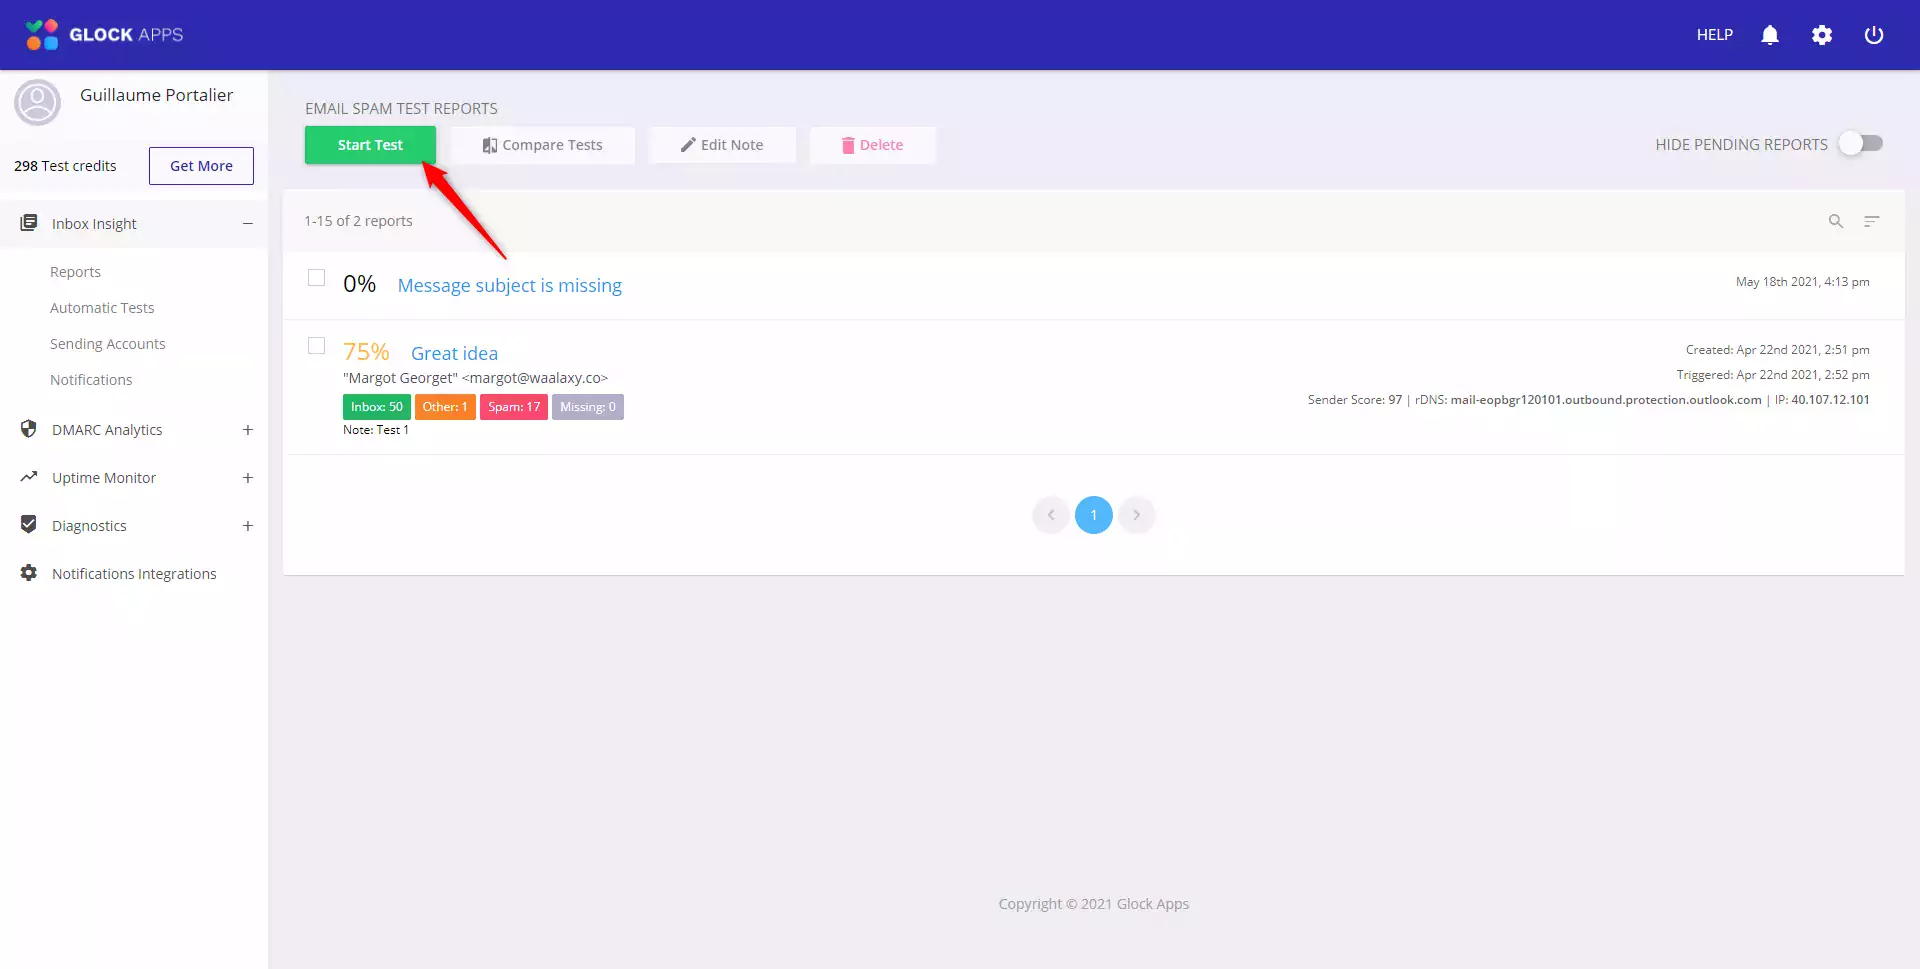 You will then see a large settings page.
Personally I keep everything activated. Then, you will have to send an email to a bunch of addresses with an id inside, to allow Glockapps to analyze the deliverability of your emails.  Then you will have to wait several tens of minutes for the site to analyze the emails sent and make a report.
Apply the feedback from Glockapp
Depending on the score, you will have to apply in detail the feedback of Glockapp. It may take a little time but it’s worth it. The feedbacks are quite detailed and will depend on the configuration you made and chose.
Personally, I got a pretty lousy score. The lack of DKIM clearly seems to be a disadvantage for the choice of OVH for cold mail…
Conclusion
What an adventure. Cold mail is indeed an adventure, because the initial setup alone is of a crazy level of complexity. At Waalaxy, we dream of a system that would do this, all by itself, for you. And as it often happens, our dreams may well come true. So stay tuned. From this technical setup, I will now attack the following in several parts:
- Prepare your LinkedIn lead generation strategy.
- Implementing your multi-channel prospecting (in several case studies according to the approaches I will make).
Until these studies are published, follow us on LinkedIn and feel free to test Waalaxy.
FAQs
Should I choose OVH to start a Cold mail strategy?
I chose OVH because it was our basic email & domain name provider and we were already working on another tutorial with Google domain + Microsoft. My answer is: no. DNS configurations are complicated, I did not find how to do Reverse DNS and my spam scores at the end are much higher than the tuto with Office360.
Can we start a cold mail strategy without doing this configuration?
You can. But the success of your campaigns depends greatly on your deliverability. So you have no choice but to go through a clean configuration.
Can I configure my DNS for cold mail with my main domain name?
Yes, but this is at your own risk because if your email is considered as spam, even your professional emails with your partners and colleagues could end up as spam…